Tips For Taking Your Product Photography On A White Background

The best way to make your products look great and create a sense of value is through high-quality visual presentation. This includes having professional photos that show off every detail, but it can be hard for small store owners without access or funds like this option since they need the proper tools in order to do so themselves. Here we will learn the tips for taking product photography with white background.

When you need a spot to highlight your company or product, adding white background photography can make all the difference. It helps to highlight the essential features of the product, which will eventually help grab the attention of the viewers out there.

You can turn a mediocre product photo into something that will make people want to buy your products with just one click. All you need are some white walls and an idea of what it is they’re selling.

Read More:- Amazon Product Photography Tips To Adopt In 2022

Here are some tips to help you capture photos on a white background:

Required Peripherals

It will not be possible for you to turn a product, idea, or anything into something noticeable without having the right peripherals. Make sure you have these peripherals before you start another photoshoot

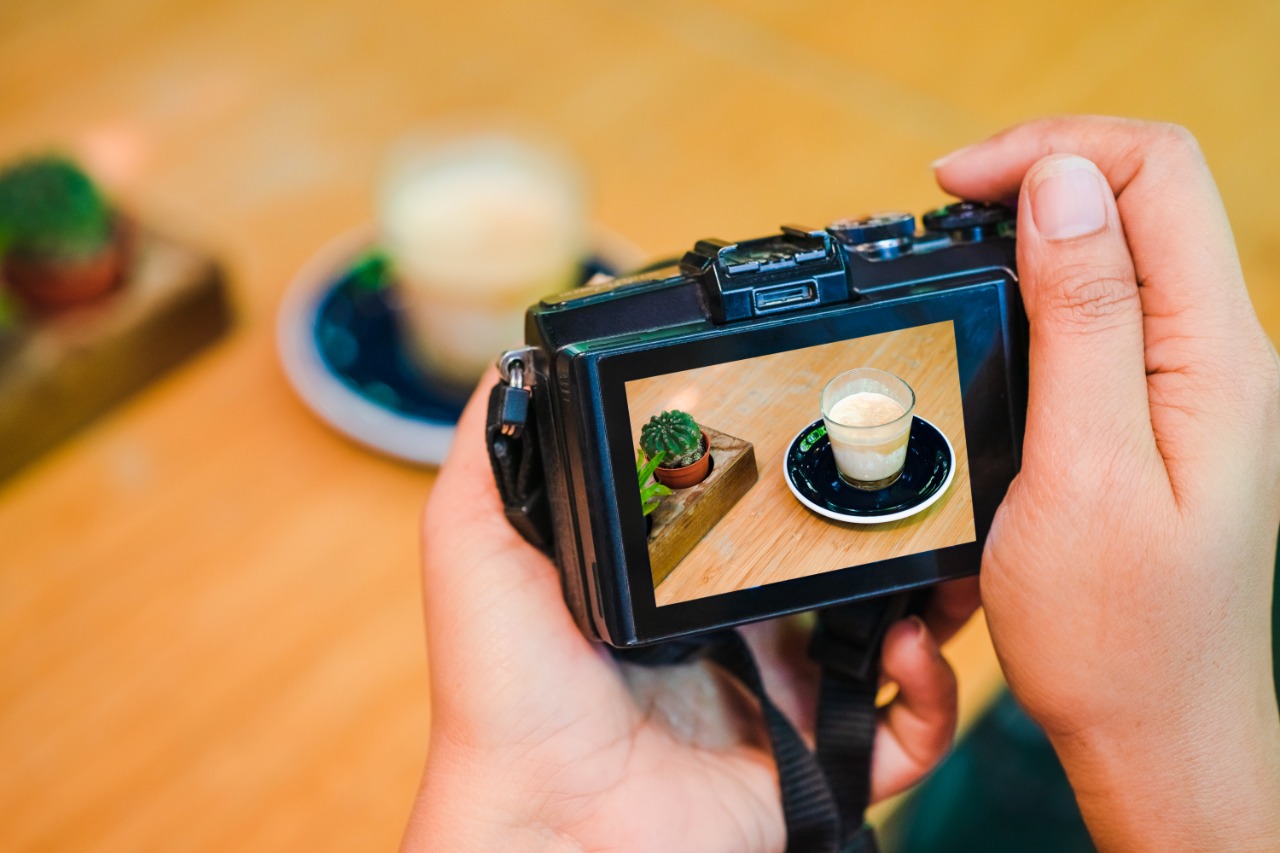
Camera

It really matters that the photographer understands the requirements of the photoshoot. It really depends upon the requirements about the type of camera to be used. Full-frame DSLR cameras are too big to lug around and set up. You can start with whatever you’ve got handy, experiment on a new camera over time until the style speaks for itself without investing in an expensive system right away!

However, if you have decided to invest in basic DSLR cameras, you can start from Nikon D3500 or Fujifilm X-T200. It will help you in grasping the ideas of photography in the beginning.

Tripod

Mounting your camera to a tripod is an essential step in the photography process. Once you have it secured, there are some things that will remain fixed and keep everything else from moving around while capturing images of varying modes like high dynamic range imaging or focus stacking which require several shots taken at different points on whatever subject matter interests you most today.

White Bounce Cards

Window light has a bright side where the sun hits it, and shadows on either side. To make things more interesting for product photography, make use of white bounce cards ( made out of foam boards ) that put an extra bit of illumination into those dark areas so they can be relieved in their product shots. It is an excellent choice because it’s rigid and can also be easily cleaned if needed.

Read More:-  FBA Product Photography: How To Make Your Main Listing Image Stand Out

Table

A smooth surface is required for your product to stay stable throughout the photoshoot. Consider getting a table with one that is wide but also long enough. The ideal size would be somewhere between 24 and 27 inches in width so it’s not too small nor too big for your needs!`

Ideal Room

The perfect room for product photography is a window that’s next to a wall. The larger the better as you’ll get more light from strong naturalistic shadows, and being closer will create softer overall tones with darker backgrounds while farther away will result in an even brighter illumination where the shadows are sharper yet lighter in detail.

Capturing Professional Photos On A White Background

When it comes to selling your products, more than 90% of consumers say that visual appearance is an important factor in buying decisions. Let’s into some professional tips you should follow to capture your next masterpiece:

Setting up the Table

Now that you gathered all the required materials, it’s time to shoot! The first thing you need to do is place the table close to the window without intersecting any shadows from these windowsills. Next, make sure that your setup goes right or left of this window at 90 degrees angle, depending on which direction light will be hitting the subject.

With natural light, the best way to get a different mood is by rotating your window. You can try putting it at an angle of 45 degrees or even straight onto the set with no obstruction for that clean and fresh feel!

Read More:- How to Increase Amazon Conversion Rates: 7 Essential Tips for 2022

Adjusting the Camera

Every camera is a little different. For some, the default setting will work just fine, and they don’t need to adjust any settings on their own. However, if you’re looking for more control over what gets captured or want an idea of how your photos are coming out then the following tweaks to your setting might help out:

  • Set your white balance (WB) to Automatic. This will allow you more control of colors and lighting for a better end result.
  • Turn Off your flash setting. This will stop any potential glare on the camera lens and ensure that you get intense exposure to whatever is in front.
  • Raw files are the largest a camera can shoot, and when edited in software such as Photoshop or Aperture will give you maximum image quality. If your point-and-shoot has this setting, use it!
  • You can set your ISO to 100 which will result in less noise. The higher the numbers are, the more sensitive they become and thus pick up on any light that might be present

Setting up the Product

There are many little details that can trip you up when setting your product. One of the most important is making sure to center yourself in front of all reflective surfaces, such as bottles with labels on them and mirrors above head height.

This can be difficult because there are often many tiny movements needed for each element, but it will go much smoother if done correctly from day one.

If your product positioning is perfect then you can try using white cards as a light modifier too. You will be blown away by the way this simple white card lights up your product. The light bounces off of it and fills in all shadows, so experiment with different angles for maximum effect.

Read More:-  3D Rendering vs Product Photography & Which One Is A Better Option For Amazon Sellers?

Capturing and Evaluating the Photo

A picture is worth a thousand words, but it’s even more than just that. Once you take the photo and look at what has been created with your camera; this will allow for the experience of both education in which skills can be improved through experimentation on various ways to make an image better over time.

After conducting several trials and errors, you might have finalized some of the photos for your product. For a better idea of how your images look, upload them onto the computer. The back of the camera sometimes misses details that are important for photography and can give unclear pictures, so I suggest using Adobe Lightroom, which provides many editing options to help fix this problem.

Read More:-  8 Mistakes Every Photographer Makes While Clicking Products For Amazon

Conclusion

Taking product photos on a white background can help you create more professional images for your products. Whether it is in an advertisement, website, or social media post, putting the product on a white background will make them stand out and appear clean

If you are looking forward to seeking professional Product photography for amazon, social media, or E-Commerce stores, contact Amz One Step today as they provide one of the most professional services in the marketplace.

Amazon Product Photography Tips To Adopt In 2022

They say that seeing is believing, but what message do your product pictures give? Are they able to tell the story about the features of your product? Or they are telling some other story where the details are misinterpreted, and the quality is gimcrack? A picture is definitely worth a thousand words, and when it comes to Amazon product photography services, its worth increases exponentially.

Consumers are always looking forward to those shortcuts which are time-saving. In this way, the first thing which comes into their mind is the image of the product. The photos provide a proper testification of the product and generate good traffic to your E-Commerce store. In the era of digital marketing, a great product is considered to be as good as it is advertised. Whether you outsource your Amazon Product Photography Service to other companies or do it yourself, here are some tips and strategies you can implement to optimize your product listings. 

Read More:- Amazon Product Photography Tips

Focus on Amazon’s Technical Requirements before Shooting

Focus on Amazon’s Technical Requirements before Shooting

You need to understand that some technical requirements must be followed when it comes to Amazon product photography. First things first, you need to save your image files in a TIFF, JPEG, GIF, or PNG format. It is better if you check your camera setting before beginning the photo shoot. Try to capture pictures in RAW mode; it gets easier to remove blurriness and edit later in different photography software. Your photos should have a minimum of 1000 pixels (either in Height or Width). Moreover, you don’t need to add any dashes, spaces, or special characters in your image name. Understand the naming convention of the product images on Amazon; include product identified (such as ASIN, SKU, etc..), followed by period along with the file extension.

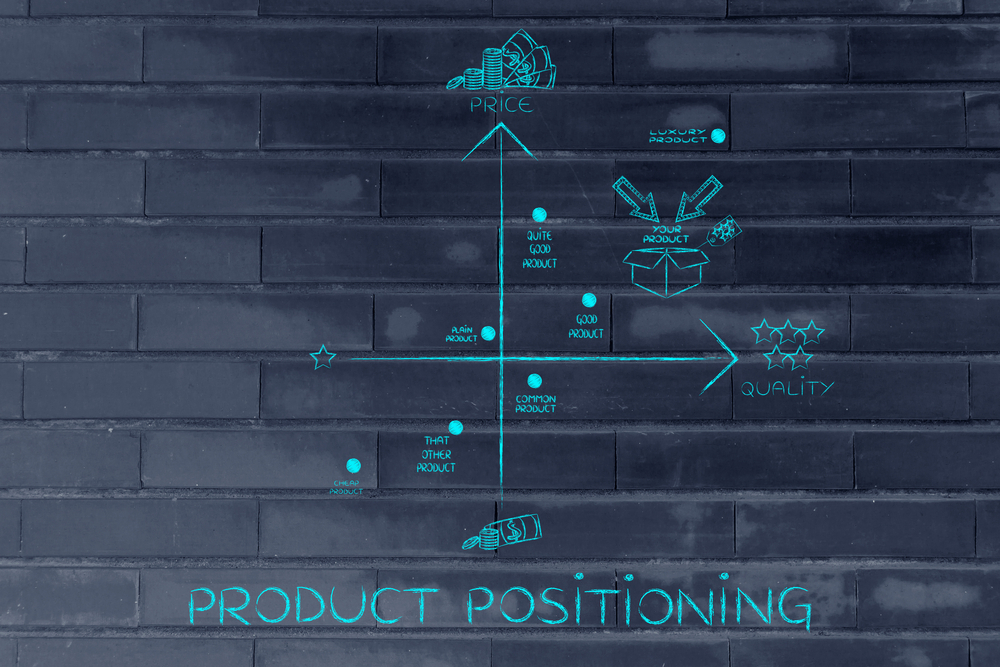
The use of Product Positioning and Image Quality

The use of Product Positioning and Image Quality

Most of the photographers are not aware that the image they take will be fitted into a square frame when they go live on an Amazon Listing. It is better if you leave some space out so that you can fit them into the frame lately. Always try to think one step ahead. In this way, the cropping will not affect the overall quality of the image. Make the most of the space by carefully utilizing the frame and avoiding the product from being crowded. There are different perspectives when it comes to adding the ‘padding’ feature. xanax 0.25mg buy online https://www.veterinary-practice.com/ Some sellers prefer using colorful paddings whereas some prefer the white background for their products. A white background is often preferred because it provides a clean, crisp, and professional look to the project.  

Read More:-  FBA Product Photography: How To Make Your Main Listing Image Stand Out

As far as the quality of the captured images is concerned, there are certain tactics that can be adapted by newbie photographers on Amazon. It is recommended to take high-quality pictures so that your product is visually appealing. Poor lighting is one of the biggest factors which decreases the quality of the product images. Unwanted shadows can cause the product to be very unappealing which can decrease the interest of the buyer. It is up to the photographer whether to make use of the studio lighting or natural light to capture professional images. It is better to experience it yourself within the space you are allotted and you can figure out the certain angles that go perfectly with the lighting at a certain time of the day. 

Save your time and learn about Amazon Features

Save your time and learn about Amazon Features

Whenever you upload the images to your listing, you might have across the term ‘300 DPI’ or some similar text. There is absolutely no need to give this a thought while uploading your pictures as it only refers to printed photos, not the upload quality ones. Moreover, it is better to perform some other micro-tasks while your photos are uploading to the listing because it can take a while. Just make sure not to refresh your browser if the process is getting time-consuming, unless and until you have an internet connection problem. 

Amazon Seller Central makes use of several tools that are meant to further optimize your product listings. Sellers need to make themselves aware of these features. The Seller Central compresses the images and processes them automatically once they are uploaded themselves. The only thing you need to make sure about your product images is to avoid re-compressing the images. Amazon adds the logo to your product listing as well on its own, so it is better not to use any photo-editing software for such purposes.

Read More:- 3D Rendering vs Product Photography & Which One Is A Better Option For Amazon Sellers?

Listen to experts round up

Listen to experts round up

It is a very well known fact that sharing is caring. People who have mastered Amazon Product Photography service do give wonderful reviews about their experience on Amazon. Ken who is a stance creative, told Jungle Scout that do whatever you want to with the camera, not in photoshop. He figured out that the more the work is done using the camera, the greater the trust will be gained by the customer.

Dorian, a renowned creative director tells the audience that there 3 ingredients necessary for a strong Amazon Brand Image;  legibility, conveyance, and style. Your product’s images need to be clean and clear so that they can be understood on any media. They need to convey a proper message and also maintain the appropriate style so that your images have both quality and audience appeal.

FBA Product Photography: How To Make Your Main Listing Image Stand Out

Universally, it goes without saying that a face is the most crucial factor for an immediate first impression. Unarguably, in the Amazon marketplace, that first impression of a product is all a buyer needs to make a split decision about it. The conversion rates of your amazon listings are heavily dependent on your product photography and brand image, but most of all, the face of your Main Image.

The game is now more challenging than ever. More than 50% of Amazon sales are contributed by third-party sellers, making a massive number of over 2.5 million sellers. One better and more competitive than the next. So how is one supposed to stand out in the crowd after all?

As an invested seller, you need to look beyond the front lines. Think bigger and picture what represents my product and exactly where? The main image will be one, but its impact can be observed in various places such as the main product page, amazon search results, external search engines, thumbnails, etc. Therefore, your target must be equally diversified. No matter where it shall appear, it has to look fantastic.  

Let us divulge into the bag of tricks we have for producing unique and outstanding main images, so you could lock down maximum buyer attention and ultimately convert sales.

Read More:- DIY Guide to Amazon Product Photography: 7 Need-to-Know Tips

[toc]

Our CEO, Kamaljit Singh has also done a video on this topic.

Use High-quality Camera

Use High-quality Camera

The first thing you need to do to make your main image stand out is to make sure you’re using a high-quality camera. A sharp-looking image is the first step in gaining customer trust. It delivers the message of confidence and will move the potential buyer to subconsciously create a connection between product quality and high-quality image display. A high-quality image works like an open book that will allow customers to observe every nook and crevice of the product to their satisfaction. Besides looking superb on the main product page, it will also appear more attractive in the search results page, making your listing stand out from the crowd. 

Read More:- Amazon Product Photography Tips To Adopt In 2022

Maximize Visibility

Maximize Visibility

The second thing you can do is make use of professional editing services. Ensure your image is cropped with such finesse that your audience is convinced of a naturally white background, leave no room for doubt. Poor cropping skills produce an extremely undesirable effect on the customer, leaving them with the impression your service is of low quality. 

What you have to do next is eliminate any extra blank space within the frame to give maximum product coverage. This will make your product appear more bold and prominent on the main image. Amazon itself recommends covering 85% of the main image with product photography. We recommend you push it as high as the frame allows without overcompensating visibility, of course. The buyers are more likely to choose your product by simply being prompted to look at the bolder image among other competitors. This way, your chances increase significantly in getting more clicks than them. 

Shoot With A Unique Angle

Shoot With A Unique Angle

Differentiation by a unique angle is a bold and creative idea. Shooting your product from a creative angle can help you grab the buyers’ attention and increase your click-through rate. After all, standing out from the crowd is your target here. Why not do something fun to help it? Although keep in mind that this shoot should still comply with the Amazon guidelines and display your product’s face as clear as possible. 

Read More:- Amazon Product Photography Tips You Should Know

Run A Split Test

Run A Split Test

The last thing you cannot afford to miss out on optimizing your main image is to Split Test your shortlisted choices. No matter how good looking the main image you think is, you can’t know if its the right choice until you split test them. You may use testing tools such as Pikfoo to split test the main image. This way, you can attain results instantly, or you can use 30 days for the first image and 30 days on the next image live on amazon. This should provide you with accurate results to help you check which image is performing better.

An Important Note:

Keeping the Amazon guidelines in mind, we understand that there might not be much you can do for your main image since Amazon does not allow extra visuals other than the product itself. Many sellers make the mistake of including icons, badges, text, or props in their images to make it stand out, but we advise against it. Amazon can suppress such listings during randomized checkups anytime. It seems rightfully tricky to make your main image stand out when the only thing allowed is just a bland photograph of your product devoid of external help.

Read More:- Amazon Product Photography : The Basics

Final Thoughts

Final Thoughts

It cannot be stressed enough that your main image is everything. Hopefully, now that you have a few tricks up your sleeve, you will find it easier to make your Amazon Listing stand out. And remember not to shy away from asking for professional help if you need it—we have expertise in Amazon Product Photography and professional editing services. 

3D Rendering vs Product Photography – Which One Is A Better Option For Amazon Sellers?

E-commerce has undoubtedly changed how we shop. These days, people buy products while scrolling through social media, expecting information fast. The customer experience when browsing for products online has become as important as the product itself. This is because users now expect a certain quality of customer service from companies.

In fact, the experience users receive determines their buying decision. Imagine how you’d react if you were to stumble upon a product listing that lacks photos but has an excellent description, rating, and recommendations. You probably wouldn’t purchase the product.

You can’t underestimate the power of a good photo. Photos are what will sell your products. It’s no surprise that quality photos create buyer interest from day one – they’re essential when it comes time for potential buyers looking at search results or product details on Amazon.

A common dilemma you’ll probably face as a seller is whether to use conventional product photography or 3D rendering. This invaluable guide offers insight into both options so that you can determine which is best for your product listings.

Read More:-  Amazon Product photography tips:

[toc]

3D Rendering?

While first impressions aren’t always everything, for online shoppers, they are. Your product listing on Amazon will dictate whether a shopper will scroll or click. If you want your product-based business to stand out among competitors, you’ll want to consider rendering, which involves the development of 2D images from a 3D model using computer software.

You’ve probably come across images developed from this process whether on billboards, a magazine, or through social media. In the highly technical world we live in today, 3D rendered images have become a significant mode of visual content for advertisers, marketers, and content producers. This process adopts an object’s visual aesthetic, providing more flexibility and detail to demonstrate an object’s features.

3D Rendering

Product Photography?

If you’re an Amazon seller you know product photography plays a key role in helping you build your brand and sell products. In fact, product photography could break or make your store conversion. It’s one of the most vital components of any product page.

You probably can’t remember the last time you purchased anything without seeing the product’s photo. Ask yourself whether you would feel comfortable purchasing a product with blurry images. Your answer would be no. We all know that product images are the building blocks for a successful online business.

The biggest challenge for me or any other online shopper is the fact that we can’t touch and see products in person before buying them. That’s why quality photography is crucial for eCommerce. Your products represent your brand and the inability to see and touch them physically means that users depend on your product photography to recognize your brand’s quality.

Regardless of the quality of your products, no one will purchase them if you post low-quality photos. Would you trust a product’s quality based on tiny pixilated photos? Probably not.  We can all agree that product photography seeks to build trust in your merchandise and give users an idea of what to expect.

Product Photography

Read More:-   Amazon Product Photography- The Basics

Choosing Between 3D Rendering vs. Product Photography

Product customization

It’s our nature as humans to crave tailored experiences. We like having options because it gives us a sense of power. After all, who doesn’t like the feeling of being in charge? As a seller, you want to showcase as many options and configurations as possible, in which case you should use 3D rendering.

If you were a furniture seller for instance, how much money and time would you spend organizing a photoshoot for pieces with different textures and fabrics? With 3D renderings, the possibilities are endless. Since the creation of renders occurs before the project is complete, you can tailor and edit features; this isn’t possible with photography.

Visitors Engagement

In today’s society, people are constantly pursuing instant gratification. It’s easy to get bored, so you must provide engaging experiences to grab their attention. When it comes to visitor engagement, 3D rendering is unrivaled.

With interactive 3D, you have the power to convert passive users into active participants. In turn, they’ll spend more time on your site and you’ll witness an increase in sales. As a customer, I want to know precisely what I am purchasing, so you need to allow me to view your product from all angles. This will prompt me to click “add to cart.”

Visitors EngagementRead More:-  Product Photography Strategies: Boost your conversion

Logistics

If you’ve ever organized a campaign photo shoot, then you understand the effort and struggle required to obtain appealing visuals. You probably had to deal with equipment, transport, location constraints, and expensive decorations.

Unless you’re handling a photoshoot for one product in a close location, traditional photography wouldn’t be ideal in such a case. If you want to display a range of products in various locations, 3D is a better option.

Logistics

Drop-Shipping

If you want to photograph a product with different configurations, you must supply or produce and store them in a warehouse. 3D visuals allow you to feature product variations without having the merchandise in stock. Therefore, you can display more products than what might be viable if you were to have everything in stock.

Any Amazon seller knows that drop shipping can decrease product investment considerably, allowing for more flexibility. If you’re considering this option, 3D is the way to go.

Drop-Shipping

Product Presentation in Detail

Professional rendering displays a product in a cleaner way than a photograph would. You’ll agree that there’s no limit to what you can do with a 3D model. Rendering allows you to showcase your products in the best light and highest resolution.

For users, we can zoom in as much as we need to emphasize certain features. This would be hard, if not impossible to achieve with conventional product photography.

Product Presentation in Detail

Time Efficiency and Cost

Turnaround time relies mostly on the variations of products you wish to visualize. If you require images for a single product, conventional photography will perhaps be less time-consuming because developing the product’s archetype with 3D is more complex.

Once you have the archetype, the possibilities are endless. If you want to visualize many options or products for a similar product, rendering would be ideal. The same applies to cost efficiency. It is true that developing a 3D archetype can be more expensive than a photoshoot.

However, once you have the archetype, you can develop an infinite number of configurations (fabrics, colors, and textures) with 3D affordably, then plan countless photoshoots for every single variation. Regardless of whether you choose 3D visuals or product photography, low-quality images aren’t an option. They’ll do you more harm than good, so ensure you select the best visualization company or studio that can provide images that exceed the benchmark.

Time Efficiency and CostRead More:-  8 Mistakes Every Photographer Makes While Clicking Products For Amazon

Showcase Different Variations or Colors

Amazon is particular with the requirements associated with product images. One of the prerequisites is that the major image should be on a pure white background, showing the product only. Remember, the main image should grab the most attention; it determines whether you’ll convert site visitors or whether users will choose your rival.

Assuming your product has different colors or sizes, it would be virtually impossible to take photographs from a similar angle with the precise exposition for those variations. How much time do you think it would take to do post-production editing, staging? And, such expenses add up fast.

Showcase Different Variations or Colors

Safety

3D can easily allow you to demonstrate features that are hard to capture in a photo. For instance, if you’re marketing merchandise that protects against injury in a dangerous circumstance, rendering is a safer, more thorough, and less affordable way to showcase those features than crashing a vehicle.

Safety

Asset and Image Flexibility

Once you’re done with a photoshoot, you can’t change the lighting, details, or layout. Rather, you’ll try organizing a new photoshoot. With 3D visualization, revisions are easy to make. You can make alterations at any point and obtain the ideal visuals. This permits you to allow corrections after the completion of the project.

It’s possible to reuse the visuals with minimal adjustment. Therefore, if you wish to develop a library of visuals that you could repurpose, traditional photography wouldn’t be of much help. In a content-rich world, the ability to reuse content with minimal adjustment could make a considerable difference.

Asset and Image FlexibilityRead More:-  Amazon: 6 Selling Hacks To Crush Your Competition & Achieve The Number #1 Ranking For Your Products

Showcase Products in Context Images

If you’re looking to display your products in the context of exterior or interior, rendering offers a great way to showcase your products. You must position the product in its natural habitat so clients can feel the distinct atmosphere your product generates.

A 3D Rendered image will impress your prospective customers with its great degree of detail, masterfully chosen light setting, and various choices for product positioning within its exterior or interior context. Rendering might seem like a new way to showcase products online, but various industries have used it for years.

You might not even recognize that those daily product images you see online are 3D renderings. They often seem so appealing that we presume they’re just photographs when in fact, they’re 3D renderings.

Showcase Products in Context Images

Bottom Line

So, which is the better option for Amazon sellers; product photography or Amazon Product 3D rendering? This largely depends on the needs of each individual business. Both have drawbacks and benefits depending on your goals. 

However, we hope that this article has helped shed some light on the pros and cons of both 3D rendering and product photography. If you’re still unsure about what would work best for your products or business, our team at AMZ One Step would be happy to help. With our experience in 3D rendering, product visualization, and 4.9 stars review on Trustpilot, we can provide you with high-quality images that will help increase sales and engagement for your products. Contact us today to learn more!

Bottom Line

Amazon Product Photography Tips You Should Know

amazon product photography

Amazon Product Photography is the initial step that the sellers need to know about. If you look at the best-selling products on Amazon, there would be a similarity in every product, the Product Photos.
When you’re selling a product on Amazon, the quality of your product photography is critical. A good photo can make customers want to buy your product, while a bad image can turn them away. Here are some tips for taking great product photos that will help your sales  and make your products look awesome:

Technical requirements For Amazon Product Photography:

  • Colour: Use RGB color space.
  • Image formats: JPEG, PNG, TIFF, GIF.
  • Pixel dimensions should be at least 1000 or larger in width or height.
  • The filenames of images should not have dashes, spaces, or additional characters, or they may be prevented from uploading online on the Amazon marketplace.
  • The image file name must have a Product Identifier followed by a period and the appropriate file extension.
  • Try using 85% of the frame to get the perfect shot.

Amazon Product Photography Tips 1: The main image:

The spotlight is on the main image since the customers spend more time looking at the main image. The customer gets the basic idea of the product by looking at the main image. So, the image must be free of any other distractions. This is why the images on e-commerce portals have a completely white background. Amazon strictly follows specific requirements for the main image.

Read More:- Amazon Product Photography Tips To Adopt In 2022

Amazon Product Photography Tips 2: The detailing:

You can add details to the product images that you take, not by using photoshop but by highlighting the characteristics of your product on the Product image. The material used and the quality of the material, the application of the product, etc., can be inserted into the product images.

Amazon Product Photography Tips 3: Experiment with your product:

The main image must meet the requirements listed by Amazon. Amazon lets you add up to 8 product images per product. Focus on how to make the rest of the 7 images more vibrant. Try using these Amazon Product Photography Strategies to add value to your product.

Highlight the benefits of the products: Use at least one image that tells the benefit of the product. This gives the customer a clear idea of the product.

Product in Action images: Amazon Sellers must know about this strategy. This adds some value to your product. Tell the customer how many ways the product can be used.

Read More:- Amazon Product Photography: The Basics

Conclusion:

Amazon product photography can be the difference between a sale and a no sale. By paying attention to the technical requirements and following some simple tips, you can take your product photos to make your products stand out on Amazon. Tell the customer how your product stands out from the competitors. Add an image stating the features of your competitor’s product and the product that you sell.

Suppose you’re looking for help with Amazon product photography. In that case, our team of experts is here to offer professional Amazon Product Photography services if you don’t want to take on the task yourself or need help getting started. Contact us today to learn more about our services and how we can help you create stunning product photos that drive sales.

Amazon Product Photography – The Basics

Amazon Product photography Service
Amazon Product Photography- The Basics

The most asked question on Quora about Amazon is “how to take product pictures for Amazon??”. Whether you take your product photographs on a high-end DSLR or a phone’s camera, you need to concentrate on the basics to get amazing captures of your product.

For a product photograph to be perfect, the photo must be crisp and detailing. The product details like color, richness, dimensions, and material of the product. You can enhance the richness of the photographs by concentrating on some features. Here are some amazon product photography tips that can make your products look more appealing.

Read More:- Amazon Product Photography Tips You Should Know

Seizing your product in High Resolution: To capture an amazing product photo it must not look blurry and must be appealing. Choose a camera that can do the work. The image must convey each and every detail. If your product image looks good, it creates an impression on your brand and remains the deciding factor for their purchase.

Background: Providing a white background for your product makes your product stand out. If you are not able to add a white background while clicking the product, you can add the background while editing.  If your product is white, you can slightly tweak it using Photoshop.

Photography angle: To take the right shot, you must have the right image angle. The “main Image” gets loaded when you search for a product on Amazon. So, make sure that the main image contains the front view of the product, the rest of the angle can accompany the main image.

Read More:- Amazon Product Photography Tips To Adopt In 2022

Making sure that no other items are there in the image: If the product images contain additional items other than the product that you sell shoppers might get confused. Make sure that your product is the only item in the product image. Amazon lifestyle photography is the most searched amazon photography-related keyword. In terms of lifestyle photography, the image quality must be of very high quality.

Product Photography Strategies: Boost Your Conversion

Can product photography really boost your sales conversion rate on Amazon?

Optimizing product images is one of the easiest and most effective ways to increase your traffic. Especially when you are in a highly competitive niche, quality images play a pivotal role and draw lines between sellers.

Eye-tracking studies show that visitors of online stores and product pages are first engaged by visual elements which makes them more likely to stick around and explore. It will remain the only way to attract the attention of a wandering shopper and will play a huge part in making a successful listing in 2021.

Read More:- Walmart Product Photography : How Is It Different from Amazon? 

Many times people go back to certain products just to see the aesthetically pleasing pictures or show it to someone as a reference product. Your product will pop up in their minds whenever a need arises disregarding any negative reviews on their own if the product images are amazing. That’s the power of photography!

[toc]

Read More:- DIY Guide to Amazon Product Photography: 7 Need-to-Know Tips

7 Facts – Consumer Behaviour

  • Average attention span of your customers is 6-8 seconds, you literally have seconds to grab customer attention (Fadi Fouladgar, Marketing & Management Consultant).
  • First impressions are important and images are processed by customers 60,000 times faster than text (disruptiveadvertising.com).
  • Online shoppers want products to be brought to life with images (78%) and product reviews (69%) (bigcommerce.com).
  • 78% of online shoppers want more images from eCommerce sites (bigcommerce.com).
  • 93% of consumers consider visual appearance to be the key deciding factor in whether or not they make a purchase (justuno.com).
  • 52% of shoppers abandon sites and do not return because they dislike the overall aesthetics (justuno.com).
  • 38% of people leave a website if they find the layout unattractive (disruptiveadvertising.com).

Read More:- Tips For Taking Your Product Photography On A White Background

Essentials to Perfection

Our target is not just to work on customer engagement but to induce customer emotions whenever they look at our products. Upload a maximum number of photos and follow the general guidelines below:

  • Main image/base image should be:
    • Striking
    • Have white background
    • Blown up, option to zoom in
  •  Width should be 500 mega pixels (or more) and length should be 1000 mega pixels (or more)
  • Product should take 85% or more of the image frame
  • Listing Images should be:
    • Highlighting product features and comparisons
    • Lifestyle, action shots, product should be in use
    • Different angles of the same product
    • Product labeling for quality assurance
    • Products on models, show people enjoying the product
    • Scale-able shots that help people understand sizing
    • Technical specifications, product information and measurements like size charts

Image Sequence. (i) Put yourself in customer’s shoes and think the order in which you would like to see product pictures. Main photo should be about your product only and listing photos should show different sides, measurements, packaging and components (ii) You can also work on a story line of pictures for example in health improvement category, start with pictures of a person in problem then move to its use/application and finally reaching the satisfaction stage. Show that customer attains happiness and their worries go away after they use your product.

Crisp Images. You might need to use a photo editor to make sure the right color balance, brightness, cropping or resizing images to yield an attractive product outlook.

Read More:- FBA Product Photography: How To Make Your Main Listing Image Stand Out

Follow the Footsteps. See how leading products in your category or another category have displayed their product photos.
All Sides. Show all sides of your product to increase trust levels of buyer, show that you are not withholding any information and you have pure intentions in informing customers everything related to the product for them to make the right choice.

Packaging. Only include it in photos if it’s relevant to the product otherwise, pass. Example can be of fragile products with safe packaging to give comfort to the shopper that the product will reach them safely.

Enhanced Brand Content (EBC). It’s an option available to add extra content (images or text) in a template form and this will appear as soon as you apply for a brand on Amazon. Please click here if you want to learn in detail about Enhanced Brand Content (EBC).

Talk to Your Customers. Can we? You can’t persuade customers yourself, apprise them about product features and let them know the history of your brand (if any) as you cannot interact with them at the time of purchase. Let these 3 things talk to your customers and be an advocate on your behalf:

  • Product Descriptions
  • Product Images
  • Product Videos

Things To Avoid

  • Background. Main image should be in pure white, do not experiment with different colors or by introducing models in your main image.
  • Amazon Policy. Your images are likely to be taken off or product ranking will be affected if you don’t follow Amazon guidelines.
  • Clarity. Images shouldn’t be blurry or fuzzy.
  • Packaging. Product shouldn’t be shown in packing unless it has some relevance.
  • All in One. Let the customer focus on just one object, your product. Avoid scattered products or parts of products.
  • Amazon Logo. Do not try to be smart by placing Amazon’s logo to attract shopper’s attention or make your product look trustworthy. You will be caught eventually!
  • Misleading Images. We do recommend editing images and make them presentable to customers but they should be realistic and should not raise expectations as customers will draw comparisons with what was promised to them online and what got delivered to them in real time. You are likely to receive negative reviews, increase in returns or decrease in seller’s rank as a result.
  • Format. Make sure you do not use formats other than TIFF, JPEG, GIF and PNG.
  • Product Identifier. File names must consist of the product identifier (Amazon ASIN, 13 digit ISBN, EAN, JAN or UPC) followed by a period and the appropriate file extension e.g. B000123456.jpg)
  • Characters. Spaces, dashes, or additional characters in the filename will prevent your image from uploading.
  • Drawings & Illustrations. Not allowed.

Read More:- Amazon Product Photography Tips You Should Know

Substandard Photos – Consequences

Product Value. People will judge during the first interaction, the value of the product in terms of moeny they are about to spend and whether the product they see resonates with the price.

Brand Value
. Images lead viewers wondering about legitimacy of your product, brand and your company. Good quality images give an impression of a strong company at the backend.

Professional Photography – Benefits

  • Years of experience using professional and sophisticated equipment in a studio environment.
  • Constant client feedback improves their skills. The range of their scope is more by working with small, medium and large enterprises.
  • They develop a better perception of what an end-user is targeting. End-user is essentially not looking for a professional photograph, they are searching for a product they can touch just by looking at it.

Photography Packages

You will have to dedicate a separate budget if you want impeccable photos that bring life to your product. You have plenty of options available online and can work with individuals and companies. They usually charge per picture or have bundle offers available, you can find plenty on fiverr for $10, $20, $50 per picture based on the profile of the photographer. However, quality is not always guaranteed with freelance photographers.

Go check our details for Starter, Standard and Extreme product photography packages by clicking here.

Metrics Tracking

Click-Through Rate (CTR). It is calculated as total clicks divided by total impressions and anything around 0.5% and above is deemed as good CTR (www.sellerap.com). Captivating and appealing images will tempt a browsing shopper to at least click which can ultimately help in improving your seller’s rank.

A/B Testing. Once you upload images, try split testing them by switching your main image with one of your listing images to see which one performs in terms of number of clicks or conversions.

Advertising Cost of Sales (ACoS). Your ACoS strategy needs to vary according to your product and you need to decide if your product requires high/low visibility. Monitor your ACoS once you upload high quality product photos, typically ‘good ACoS’ for a seller means low ACoS for maximum profitability. Your product page and price are half the equation in creating a conversion. Your product page will only achieve greatness if you have high quality product photos.

Conversion Rate Optimization (CRO). Monitor the conversion rate after changing images, see how visitors convert into repeat visitors and finally into customers.

Read More:- 10+ Easy & Effective Strategies for Amazon Product Ranking

Decoding Shopper Mindset

At times we neglect most common things, lets dive deep into the basics of online marketing.

R.I.P. Customers look at Reviews, Images, and prices. Only price and images are directly in your hand, you can’t write reviews yourself. If price and reviews are integral in making a purchase then images stand as the biggest factor someone clicks on your product.

Break Down The Buying Process. What do you do when you are buying a product in a shop? Let’s say a ceramic mug. You go into a store, look at the mug, pick it up, see it from all sides and buy it. Can shoppers do the same while purchasing online? They are deprived of their basic right to feel the product. For this reason alone, we need to realize that customers will always look at online products dubiously and will scrutinize, cross-check, verify in whatever way they can.

Classic AMZ Seller Mindset

Experienced Sellers. It’s painful to see sellers with superior quality products, great reviews and product descriptions displaying poor images suffer with conversion rates. Competition is getting fiercer, soon people will be ignoring the products altogether with single or low quality pictures.

Skills. Some people underestimate photography, take it lightly and want to save the cost. They fail to understand that it is not just photography skills at play, it is it’s unique combination with marketing knowledge that makes it a key ingredient in the recipe of success.

An Investment. Is it expensive? Yes it is! Like all other quality services. A mature seller’s question should be, is it worth it? Will it bring about any change in the conversion rate? You can always determine the per-unit cost and spread it over to the number of units to make the impact feel less.

The Risk. Some customers try different products just for fun while others are not interested in experimenting. You have to satisfy the risk averse, by handing out as much detail to win their trust and we also need to address the risk takers by showing them powerful promising product photos that tell them that their purchase will provide a different and better experience they were looking forward to.

By Products

Quality images are your asset and you can use them in advertising on different platforms to drive audiences and run online campaigns alongside:

  • Facebook pages
  • Instagram
  • Website
  • Twitter
  • Emails

Take Away


No matter how good your product is, it WILL NOT SELL if your product images are not promising and this factor will remain a sales booster next year.

Our team actively works with Amazon Sellers and eCommerce websites, feel free to contact our experts if you need support in your product launch journey.