With a reported $500 billion in annual sales, Amazon is one of the most trusted names on earth. The question is how do they make such an incredible impact? It all starts with their photography!
A recent study found that when customers were satisfied by product images and reviews then there was a 64% higher chance for them to convert into buyers than if someone else reviewed it before.
“In today’s market,” Dr. Joe Simonson says, “you’re competing with people who have millions of dollars on digital billboards.”
Read More:- Amazon Main Image Optimization Strategies – Double Your CTR
What is Amazon Product Photography?
Amazon Product Photography is a process of capturing and presenting images to promote products on Amazon. Fulfilling the requirements for high-quality, engaging images will increase your product’s visibility and improve conversion rates. Improving your product image can lead to increased customer satisfaction, higher rankings, and more sales. As Amazon sellers, it is our job to make sure that our products are visible and prominent on Amazon so they get seen by as many people as possible!
Read More:- Walmart Product Photography: How Is It Different from Amazon?
What are the benefits of Amazon Product Photography?
The human brain can process an image in just 13 milliseconds. That’s a lot faster than the time it takes to blink your eyes!
Good photography is essential for any e-commerce seller. It can make or break a sale, so investing in high-quality images should be at the forefront of your mind when taking pictures! Therefore, investing in quality images should be the priority of every Amazon seller. So what does using Amazon Product Photography give you?
1. Higher Conversion Rate or Unit Session Percentage
Good photography can make your listing conversion rates go up as high as 25%.
A recent study found that when sellers added professional pictures to their listings saw an increase in sales. Amazon is one of the largest eCommerce sites with more than 500 million products and countless buyers every day, which means there’s plenty of room for improvement if you’re not already doing well enough!
2. Helps in Branding
The way you shoot your brand will reflect how customers and potential clients perceive it. Creative and considerate photography makes for a more intimate connection between customers/ prospects. However, harsh angles create distance which is not conducive to building trust or empathy in the viewer – especially if they’re looking at product photos too much!
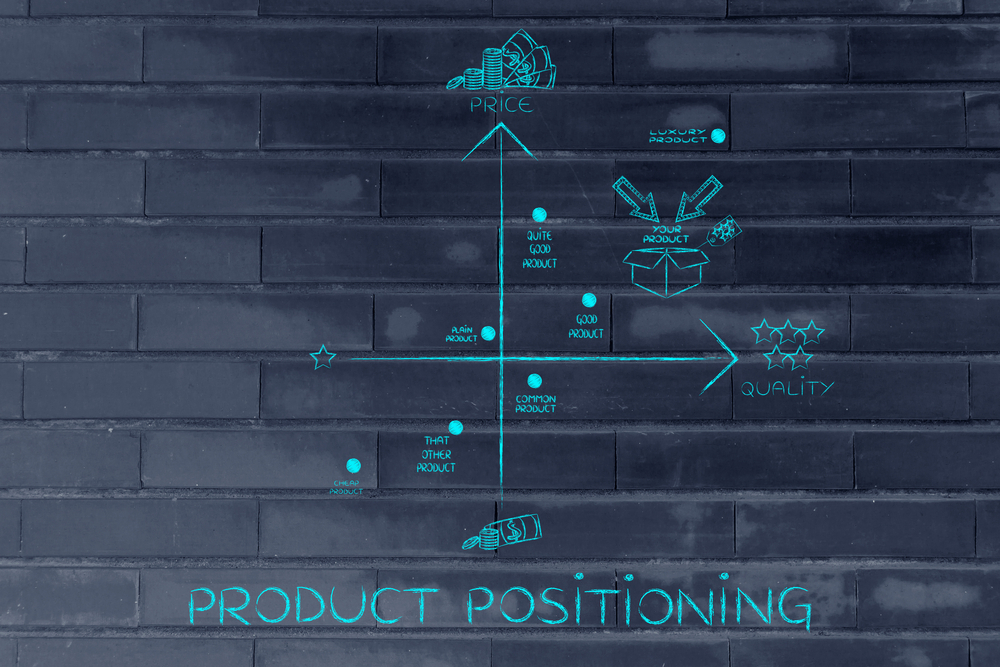
3. Increases value proposition
With so much competition in today’s market, it is essential to stand out from the crowd. Great Amazon photography can do just that! Amazon photography is an integral part of the marketing mix. It can increase a company’s value proposition and drive sales, which in turn creates more profit for them!
4. Reduces returns and refunds
Is a picture worth 1000 words? It’s more than just an aesthetically pleasing image. Pictures have been proven time after again as one of the most powerful ways for businesses (especially ones that deal with consumers) to reduce their risk while also improving customer satisfaction levels through increased trustworthiness!
Read More:- Amazon Product Photography Tips To Adopt In 2022
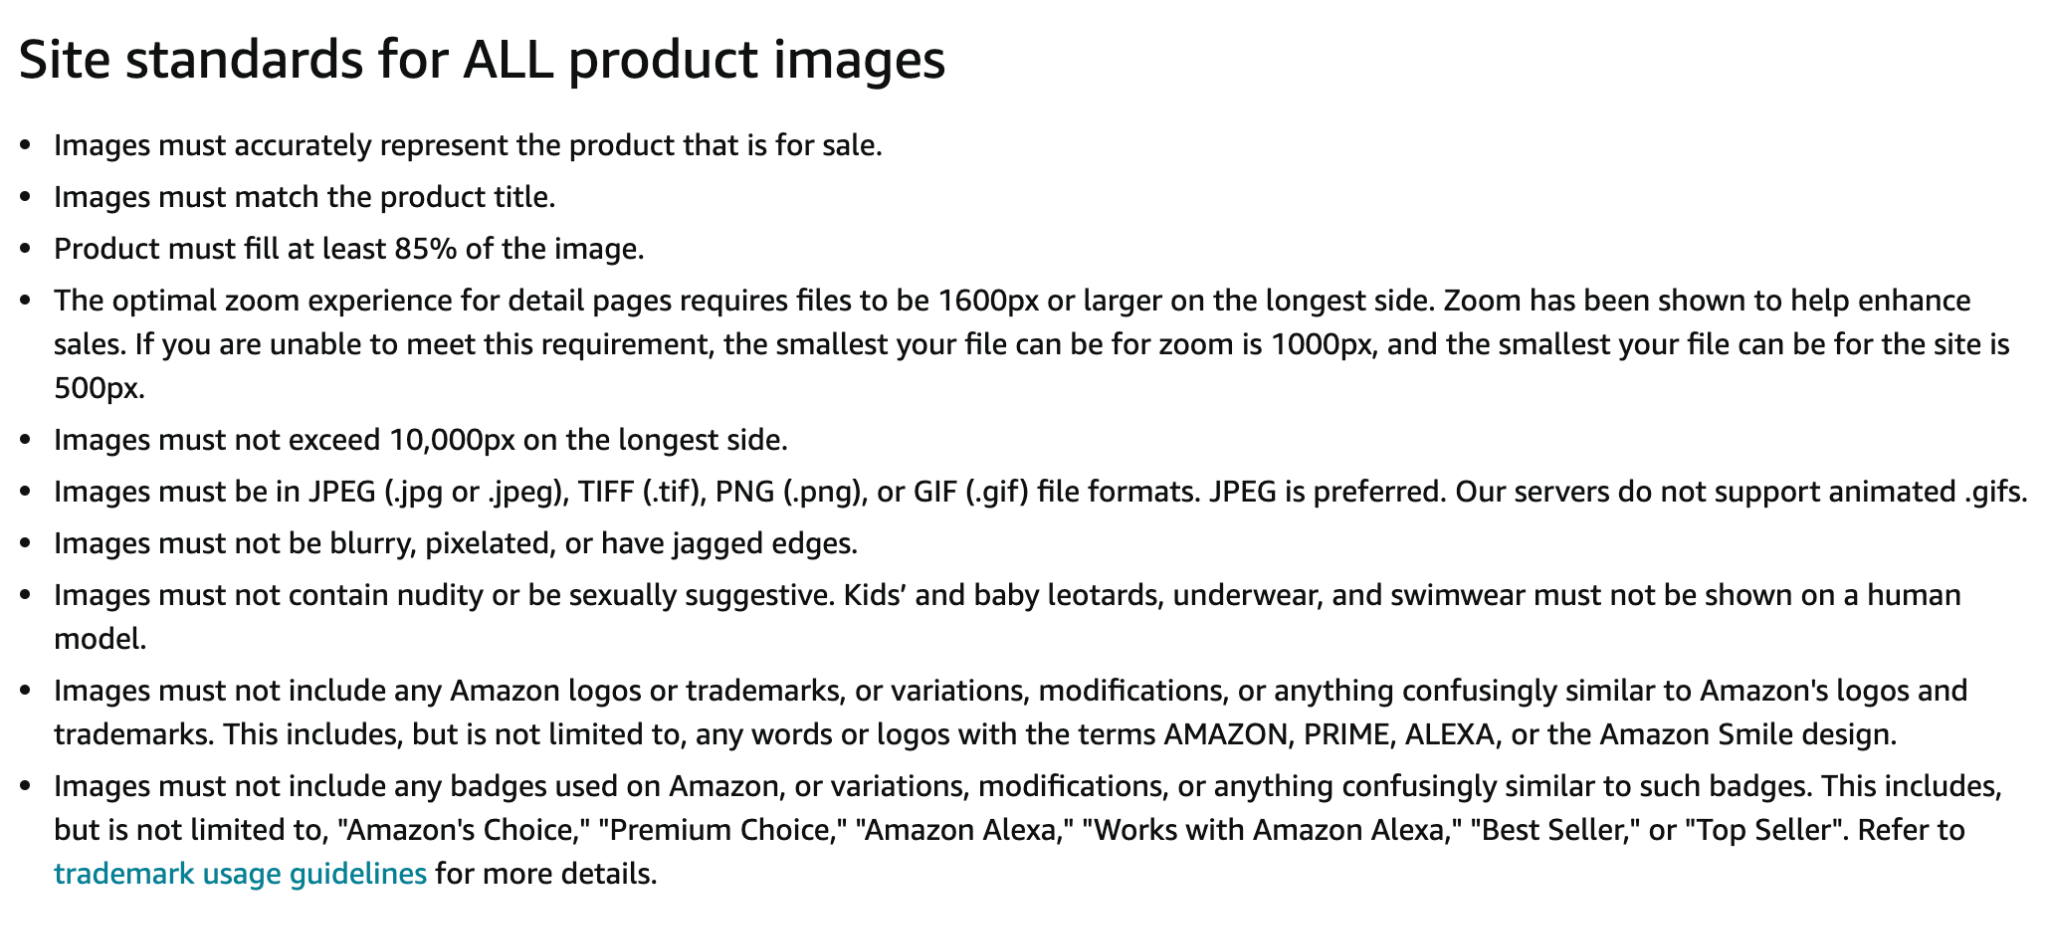
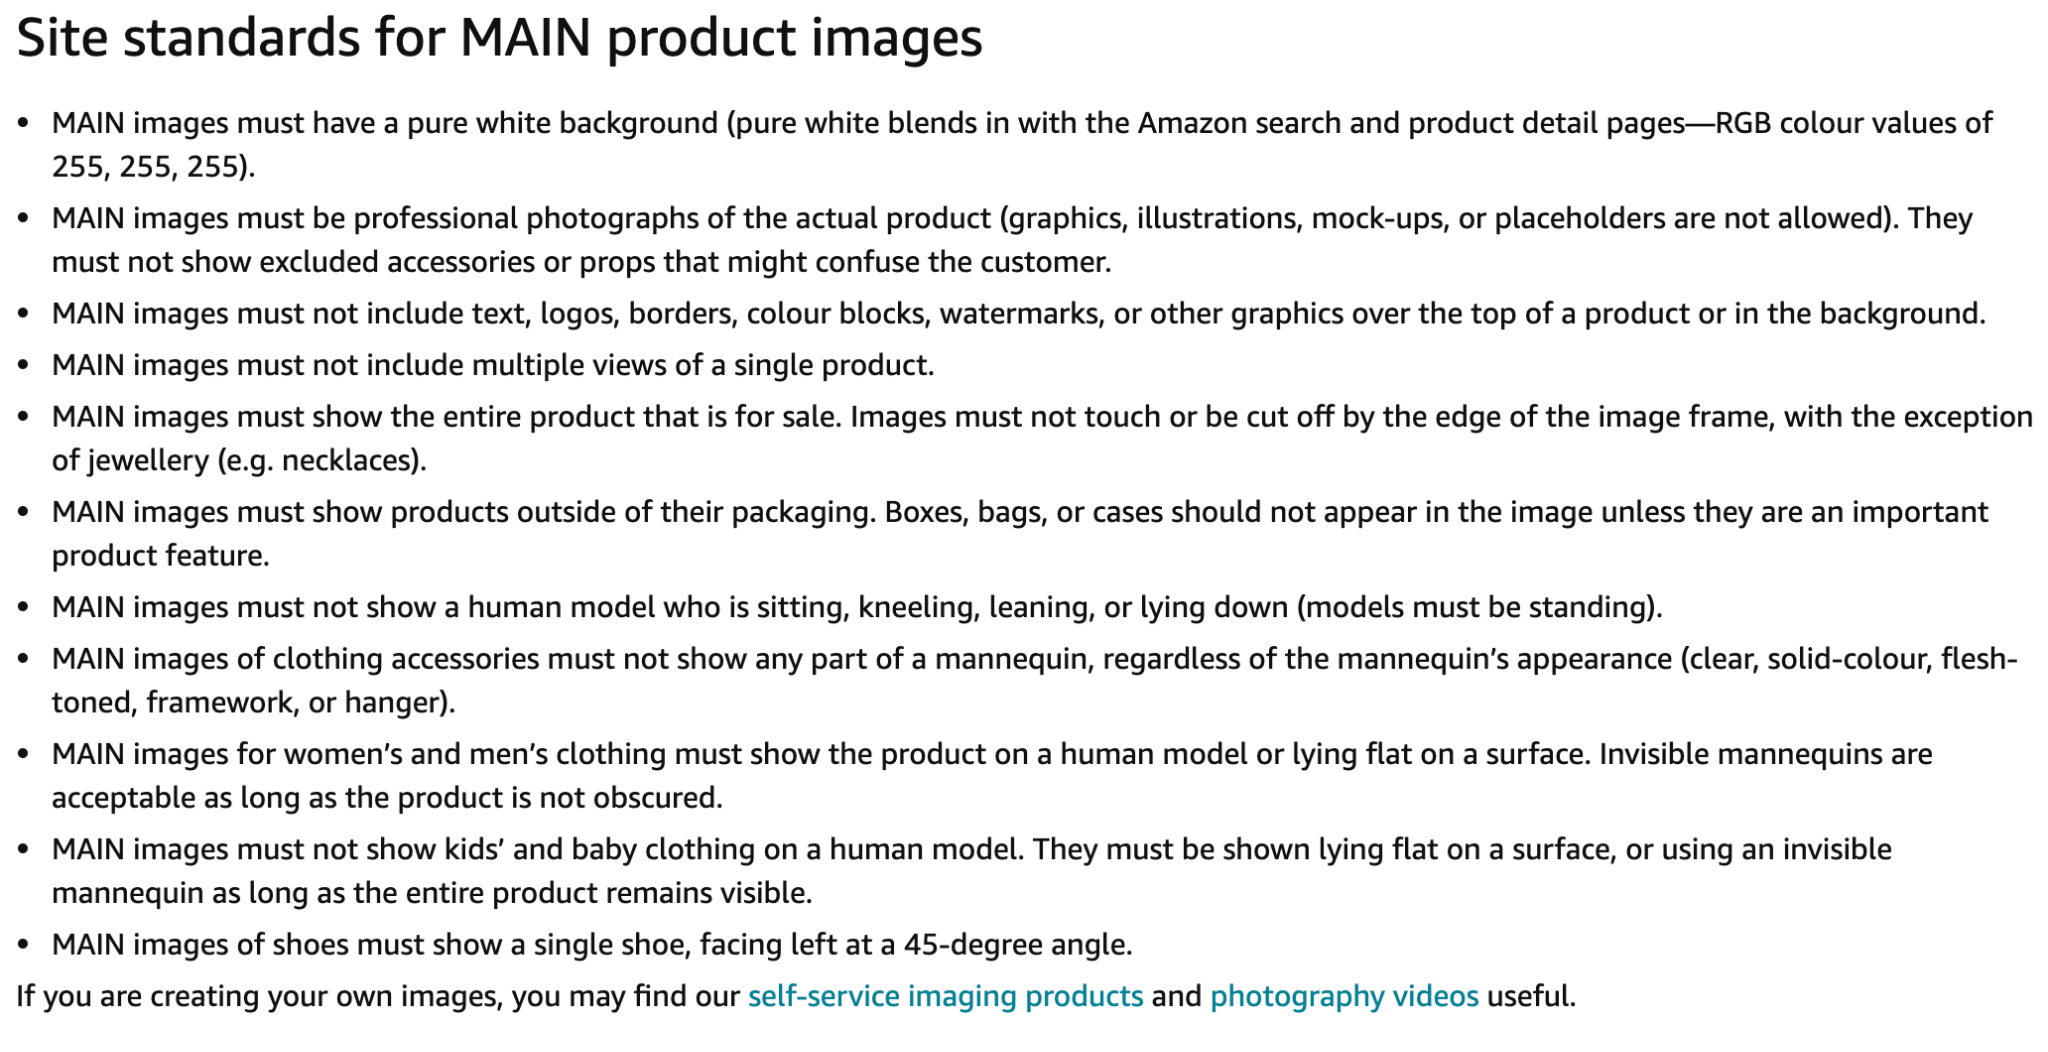
What are Amazon Product Photography Requirements?
Picture-perfect images are priceless treasures that capture the heart and soul of a business. They speak volumes with just one glance, creating memories so lasting they never fade away!
A picture worth 1000 words is more than an aesthetically pleasing image. Pictures have been proven time after time as one of our most powerful ways for businesses (especially ones who deal primarily or exclusively online) to reduce their risk while also improving customer satisfaction levels through increased trustworthiness!.
Following are the guidelines for staying within Amazon’s ToS.
Key Elements of Amazon Photography
Ever wondered what goes into making a great photo? In order to make your listing photos stand out, you must keep these three elements in mind. All of these elements require different skill sets like photography, design, and marketing.
I will do my best to explain everything in this blog. Alternatively, you can contact Amazon photography experts like AMZ One Step.
So the key elements are the following.
- The Main Image or Hero Shots
- Infographics
- Lifestyle Images
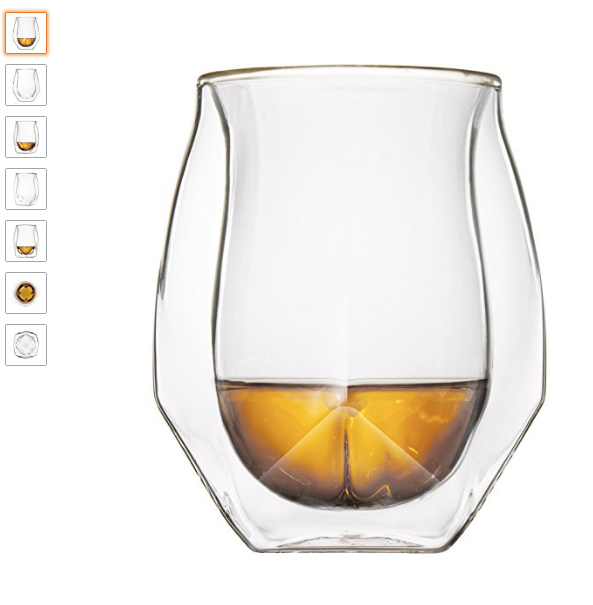
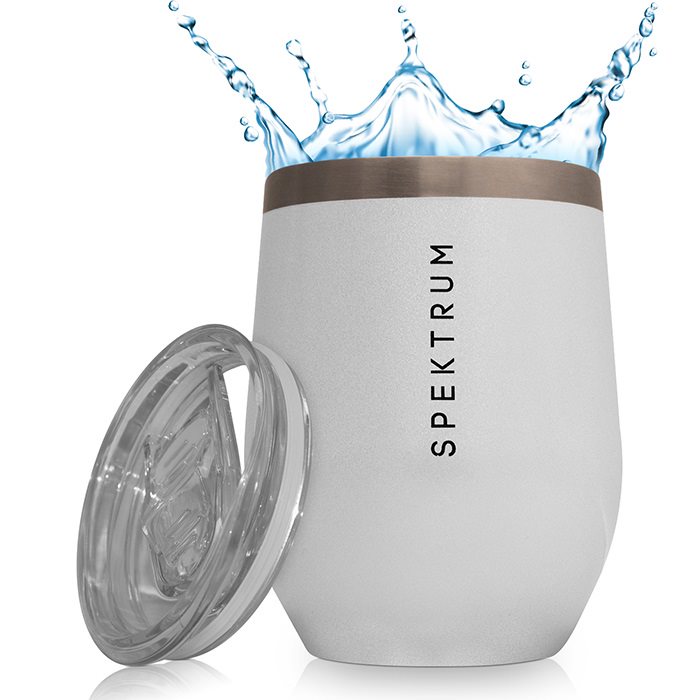
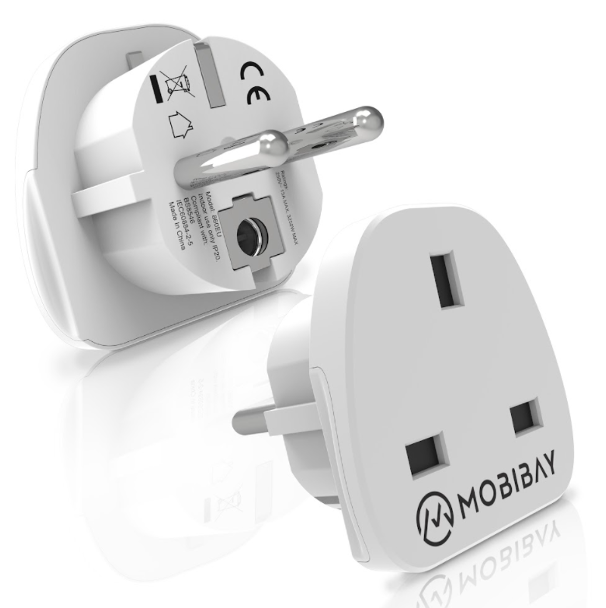
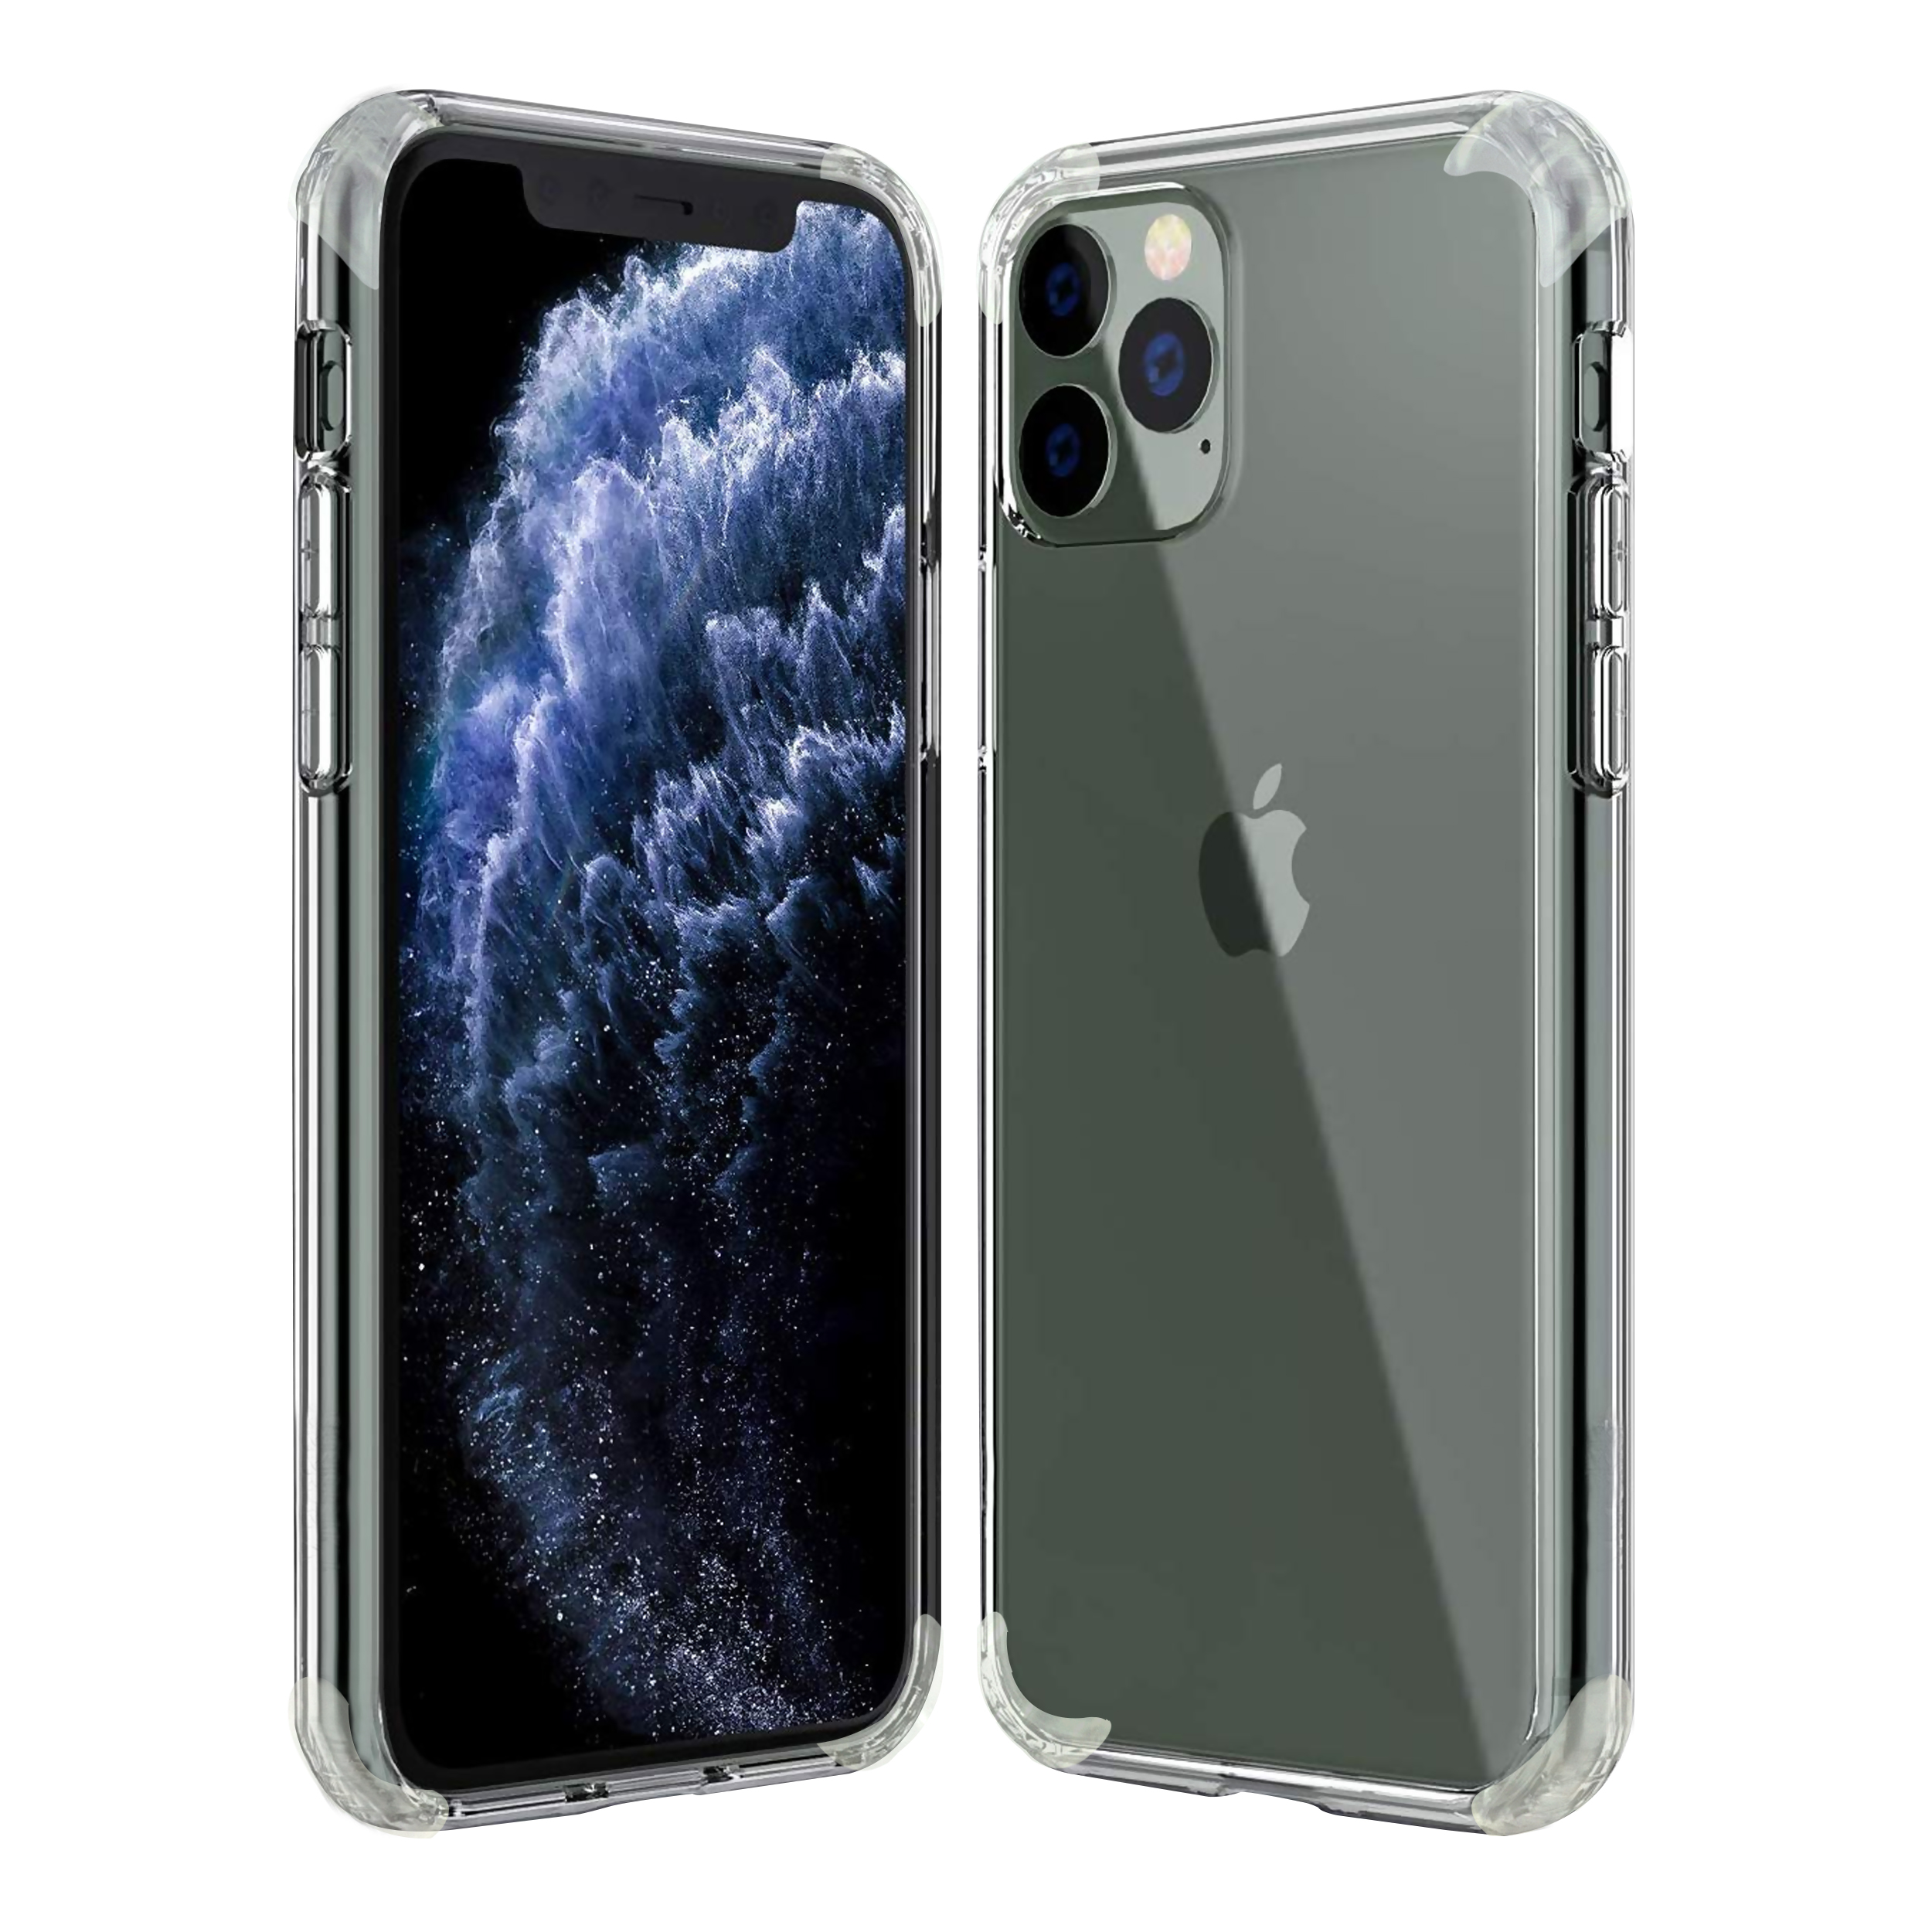
- The Main Image
The Amazon main image is exceptionally vital to the success of your product.
“The Main Image”, as it’s called in marketing jargon, represents about 50% more sales than other images combined!
The main image can drastically increase your CTR. When shoppers scroll through the search results, the main image is the first thing they notice. It is quite obvious that the more clicks you get will result in more sales. High CTR and sales can help in Amazon’s ranking as well.
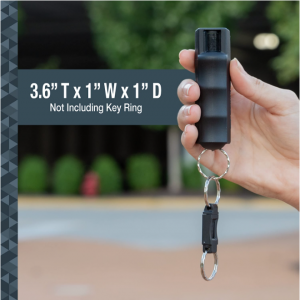
Amazon Main Image Requirements
Best Amazon main image examples that you want to take inspiration from.

You can also read our full guide on how to make your main image stand out?
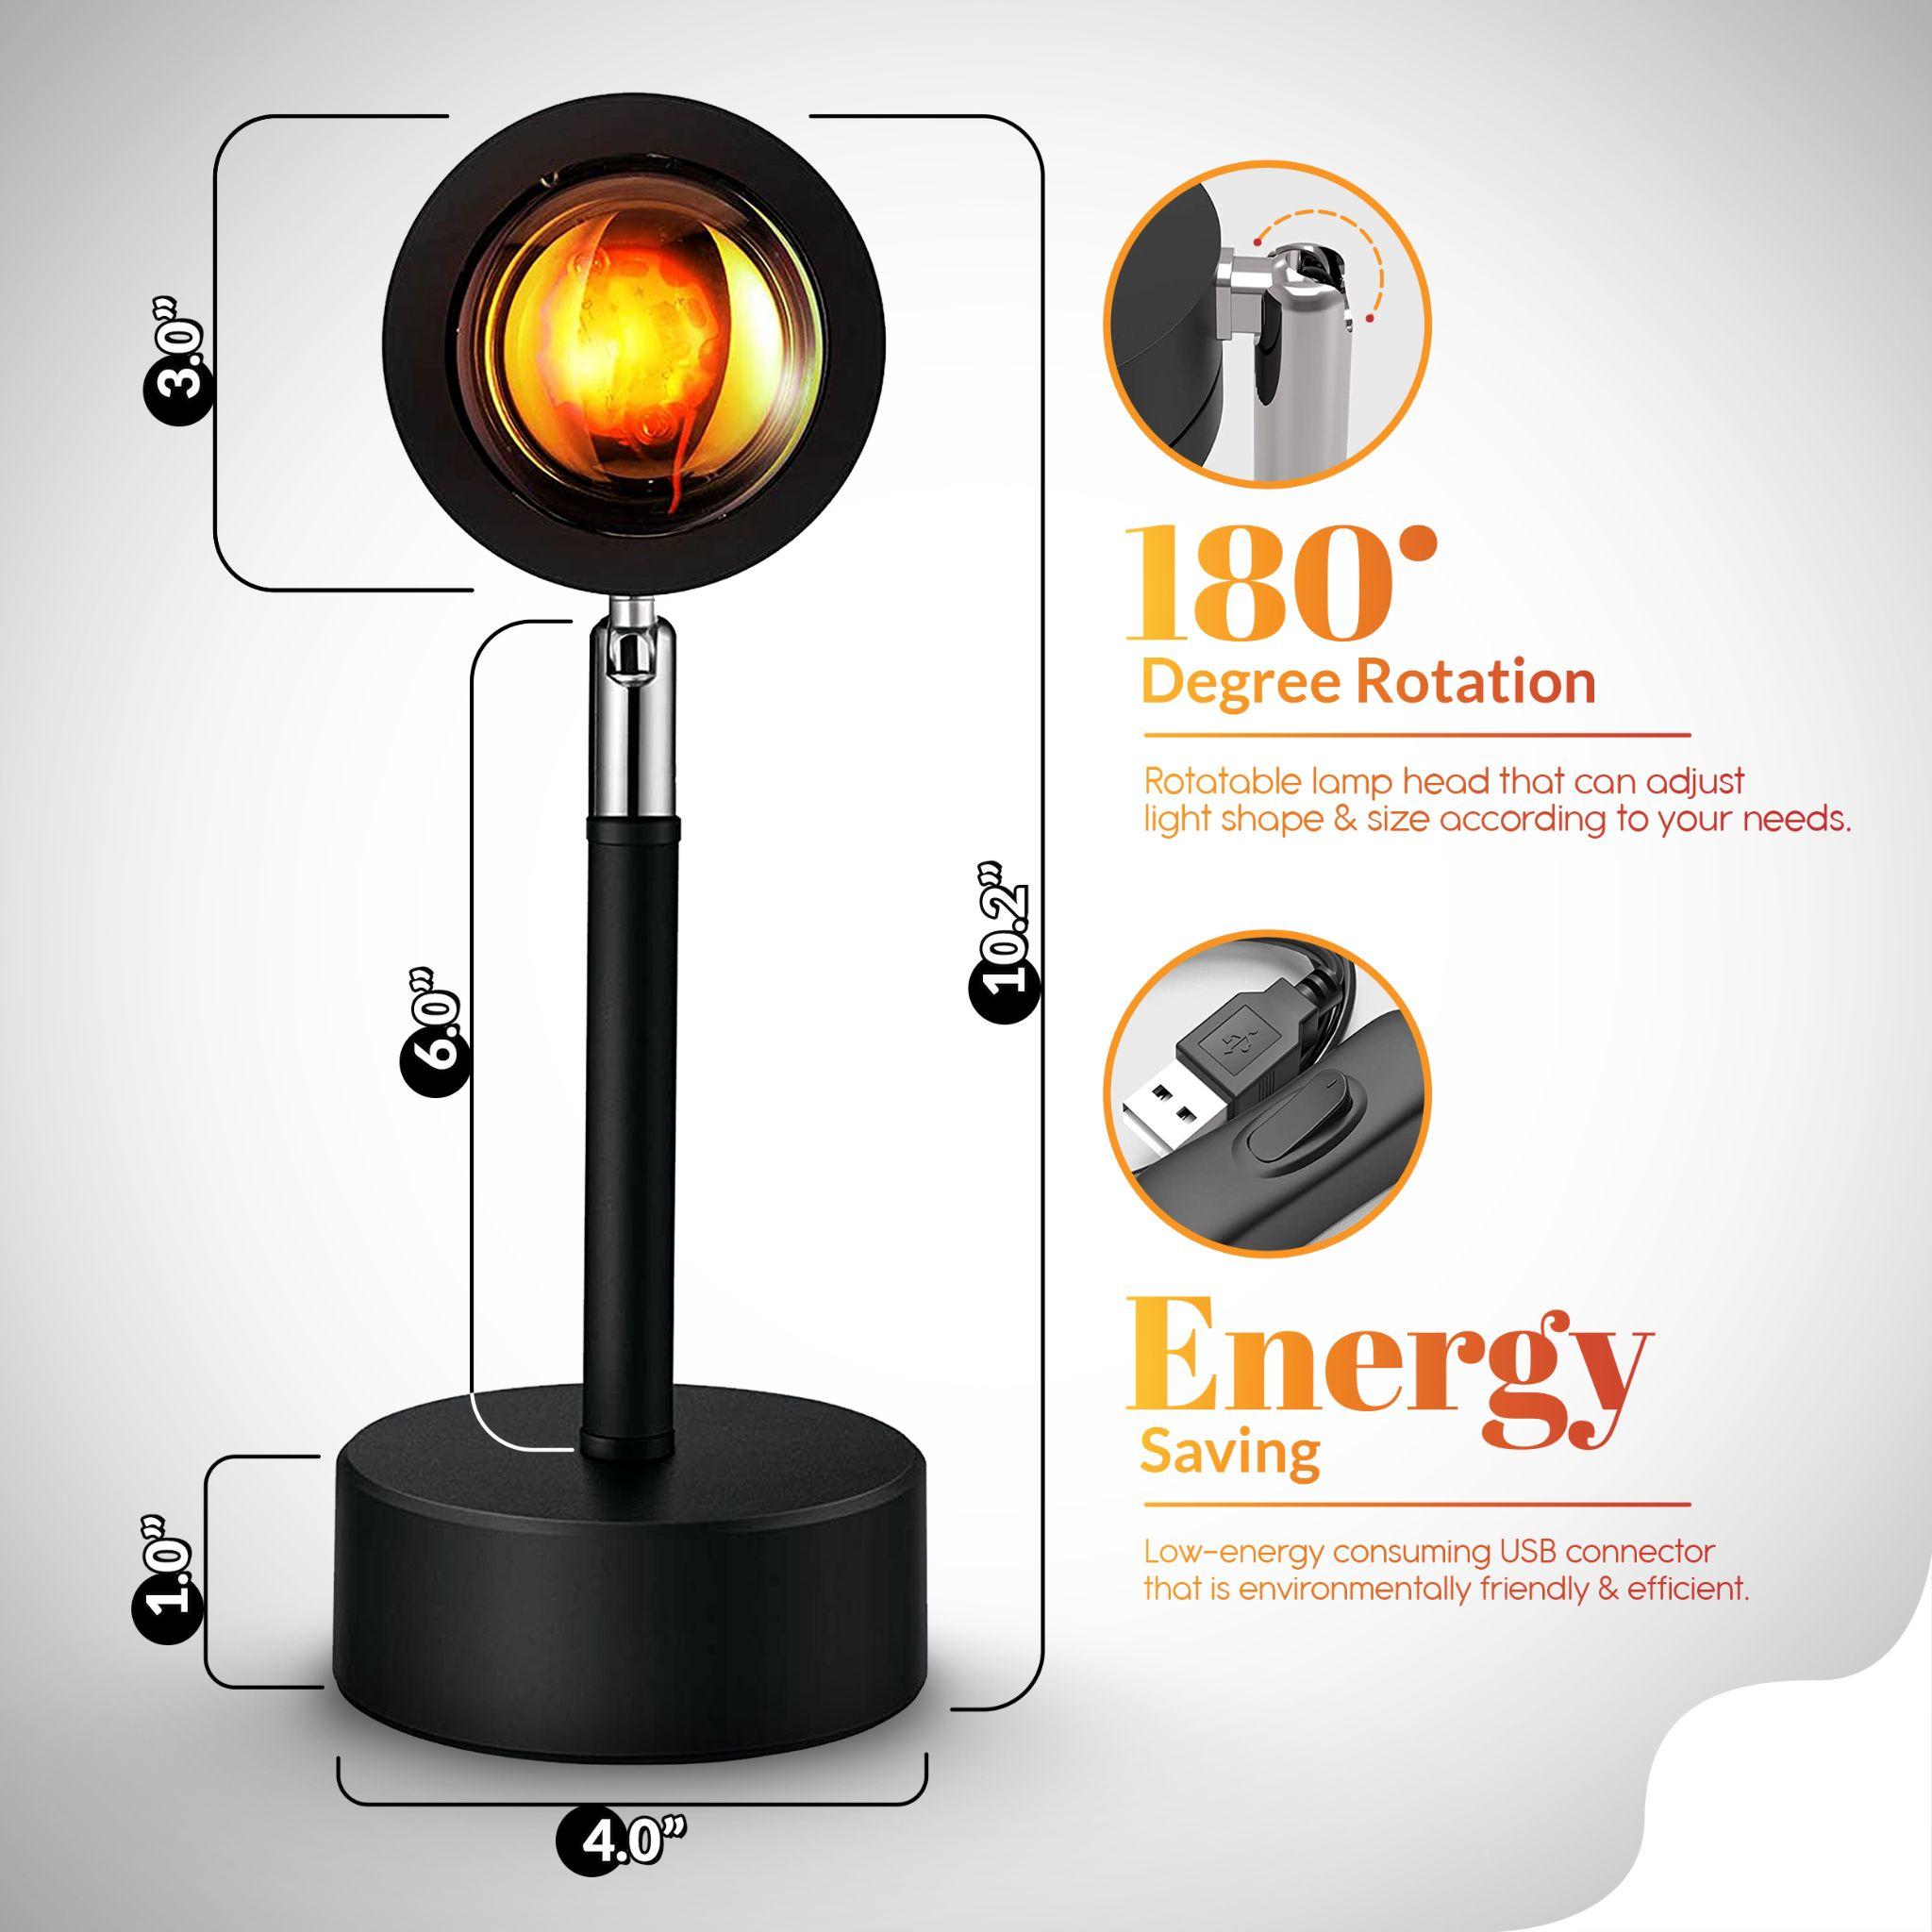
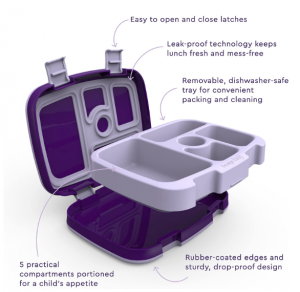
Infographics are a great way to summarize information in an engaging and easily digestible manner. This is especially true when you have limited images to showcase features and benefits of your product.
Amazon listings with infographics tend to convert more. Shoppers want quick information. If shoppers have to struggle to find the information they will bounce back from your listing. Infographics are the best way to highlight your product features.
-
Best Amazon infographics examples

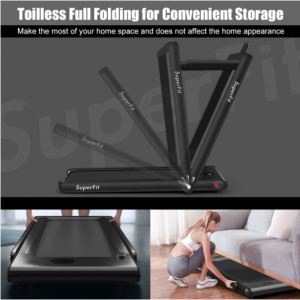
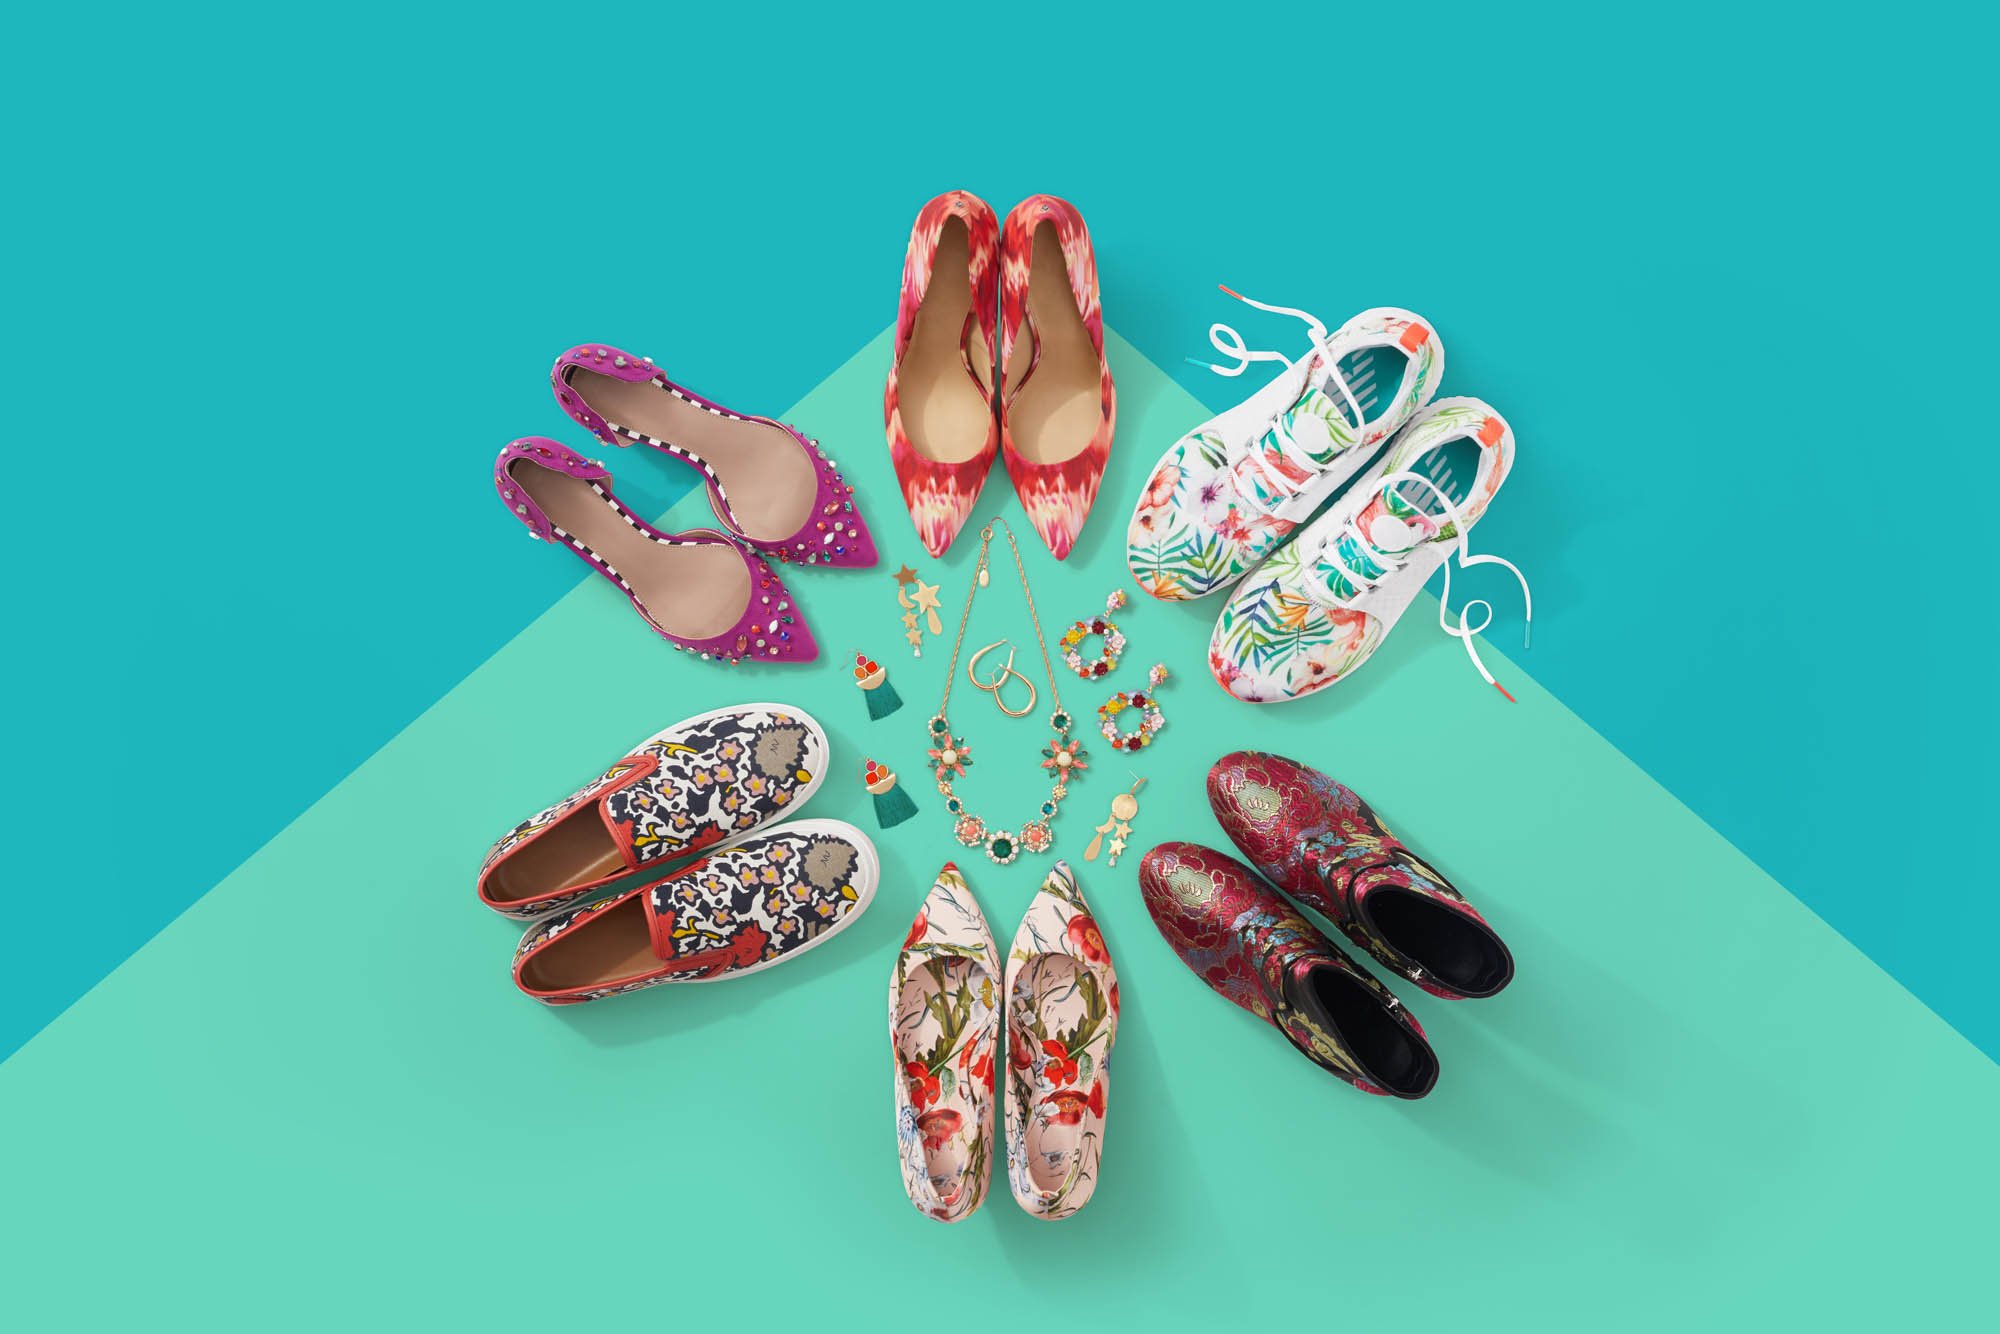
When you show your product in use, in a real lifestyle environment, it is called lifestyle image. With lifestyle images, shoppers can imagine themselves using the product.
Lifestyle photos are also a great way to target your demographics. This may also lead to an emotional decision to buy your product. If you are not using lifestyle images in your listing, you miss out on more sales.
Read More:- Amazon Product Photography Tips You Should Know
Check out some great Amazon lifestyle images examples


Best strategy to increase Amazon sales with Killer photos
One of the best ways to increase sales on Amazon is by getting killer photos. Before you can create a product that people want, it’s important to understand your target audience. Make an avatar of them and read reviews or questions they might have, so their needs are precise in mind before making anything at all! You must understand your product and buy it before taking these steps. The key to increasing Amazon sales is a killer photo. Your products will sell better if they show up in people’s feeds and on their screens with creative, informative images that engage the viewer.”
Read More:- FBA Product Photography: How To Make Your Main Listing Image Stand Out
What kind of Amazon images converts more?
- Killer Main Image that increases CTR
- Focus on benefits
- Highlight Product features
- Before & After Image (if applicable)
- Using Lifestyle photos
- Show Dimensions
- Show Unique Selling Point
- Use maximum photos allowed by Amazon
- Show Packaging (if giftable)
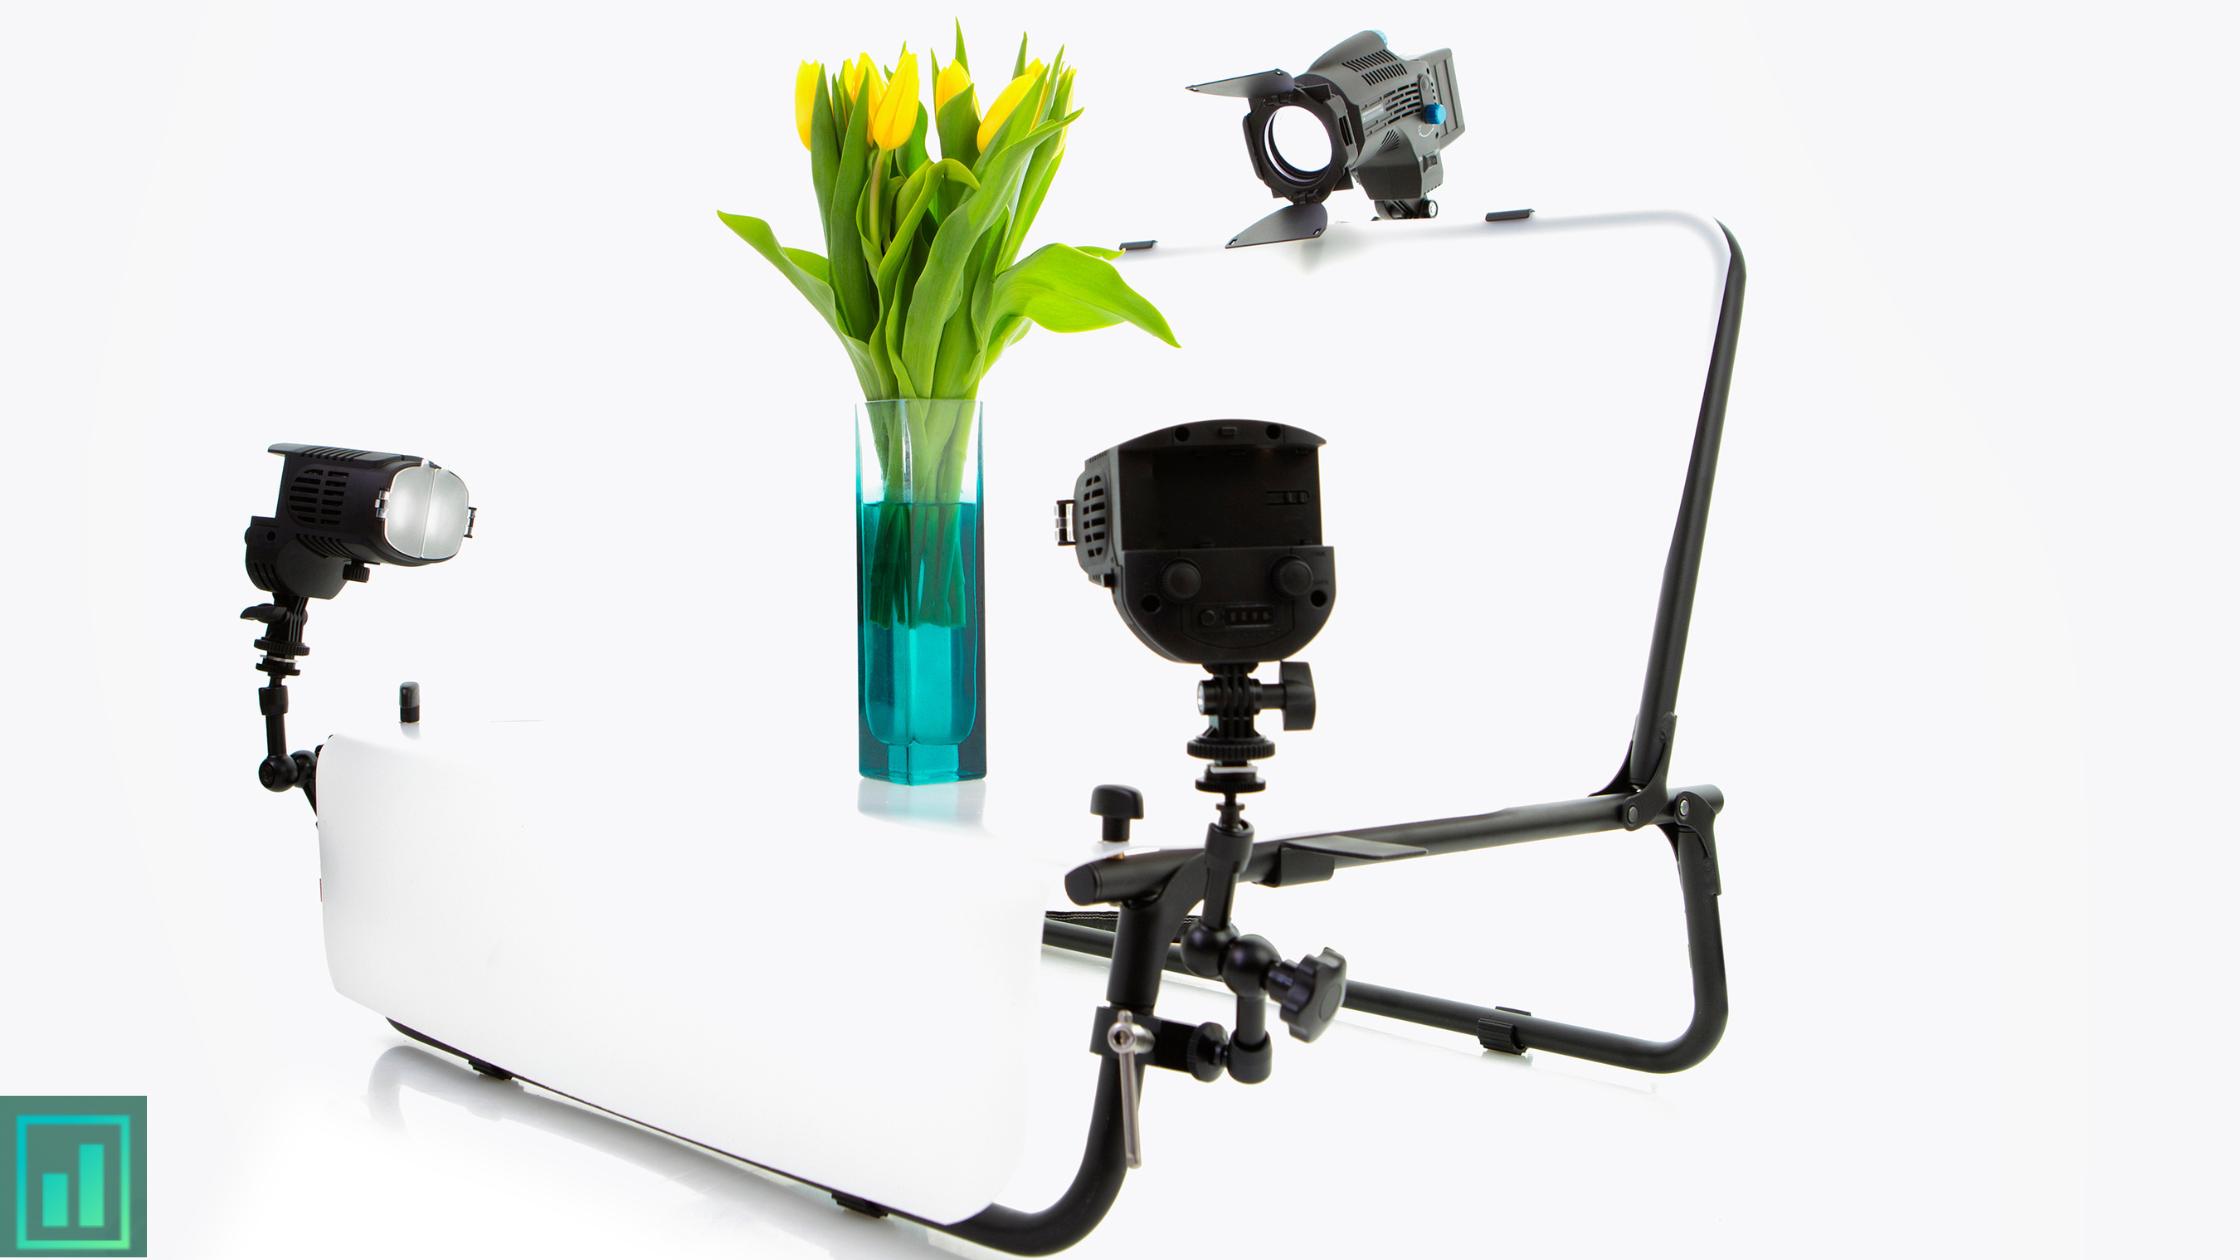
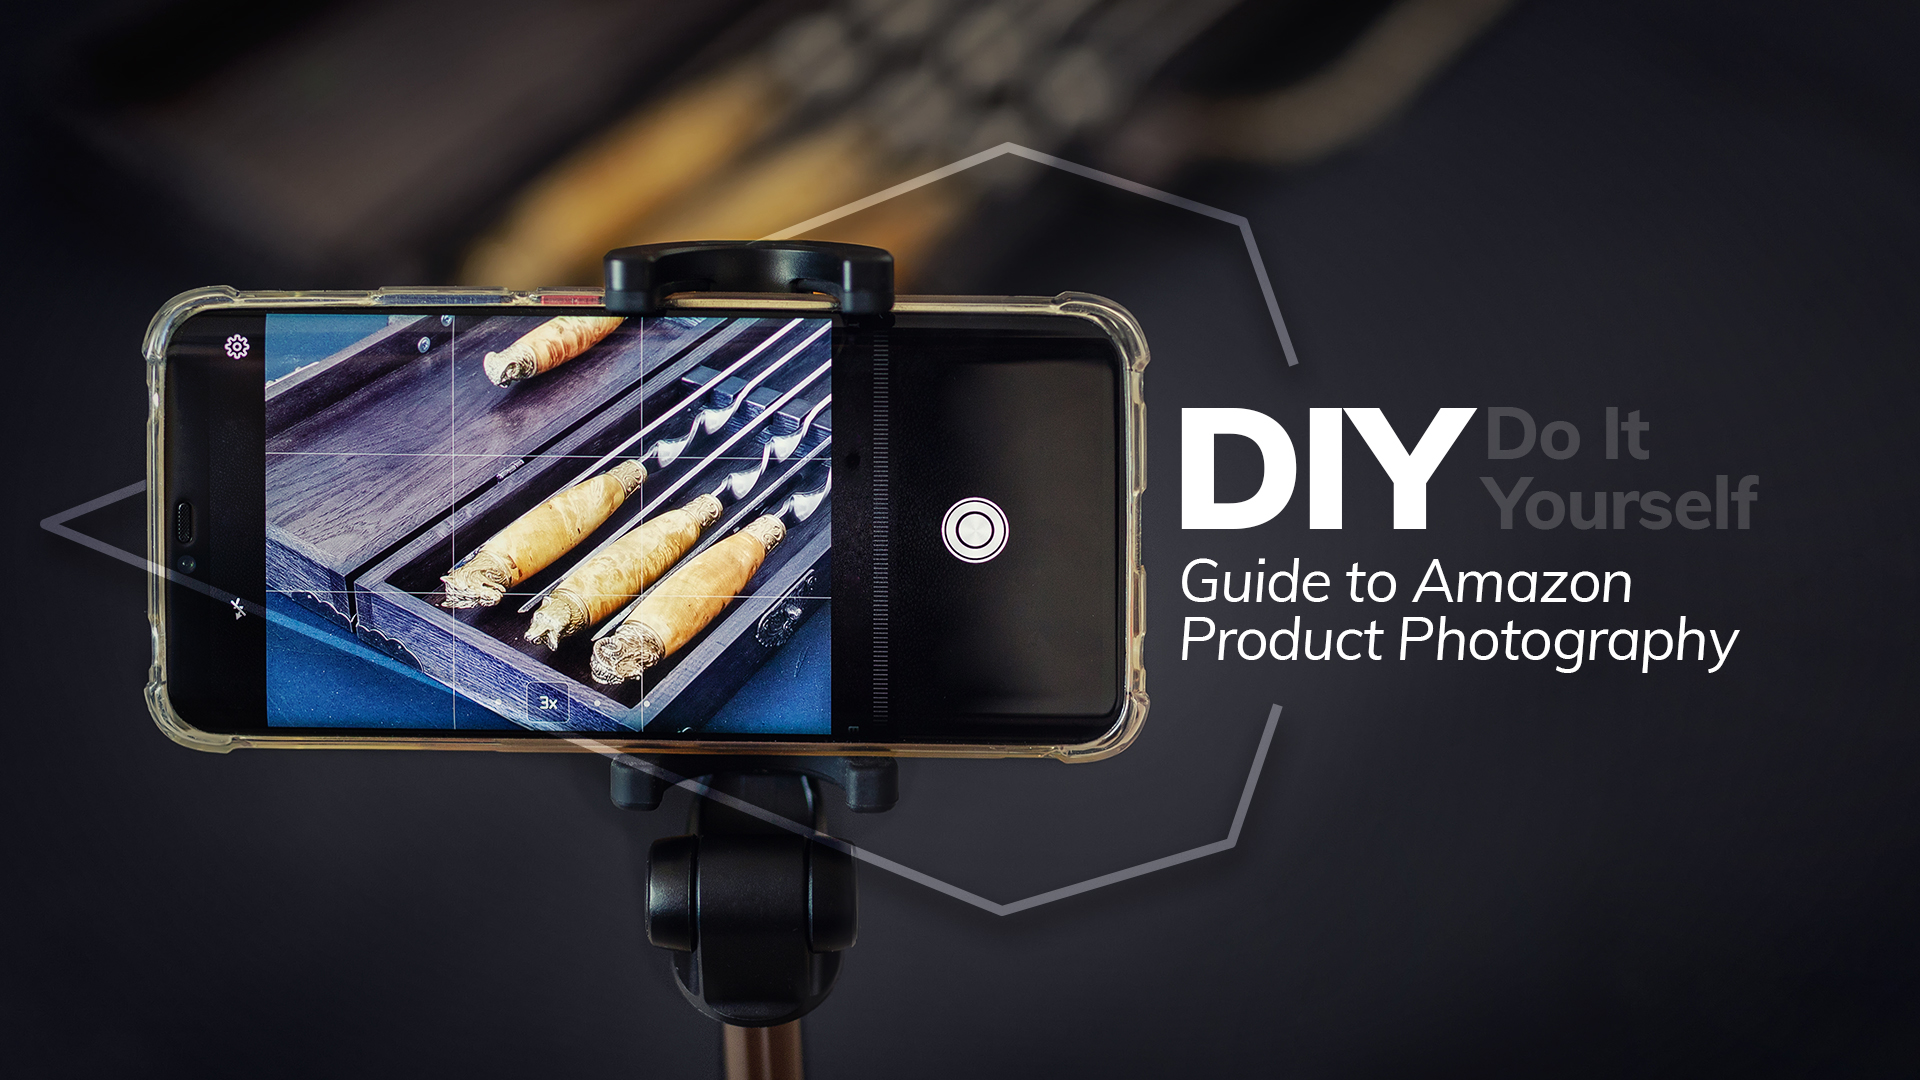
Should I hire a professional Amazon photographer or do it myself?
Whether you’re just getting started in the world of Amazon or looking for more exposure to your product, working with professionals can help produce great results. If it’s possible to do it yourself then go ahead and take advantage! But know that there are definitely benefits from partnering up, most importantly having someone who has experience under their belt when they film footage for promotional purposes only goes towards improving customer engagement which ultimately leads back into increased sales opportunities downline (and trust me; we’ve seen what happens).
The recommendation is to work with professionals, it’s possible to do it yourself.
You need a camera and good lighting if you want to do it yourself. Professionals know what works.
If you want to do it yourself, Here is our DIY Guide to Amazon Photography.
Should I photoshop stock photos or use real models for photography?
The answer to the question of whether or not you should use real models for photography is a resounding “yes!” If your photos need an extra boost in creativity, go with stock images. However, if what’s needed most are new ideas on how best to present their products, then hiring talent from agencies specializing in this field could be more beneficial than using generic pictures found online.
Whether you are using stock images or accurate models for photography, let me tell you that both have their pros and cons. It depends on the nature and type of your product. You can jump on a call with our experts using this link to know what will suit your product.
Watch this video to understand the difference between stock photos and real-life photography.
https://www.youtube.com/watch?v=SCAsc2Caf7E&t=1s
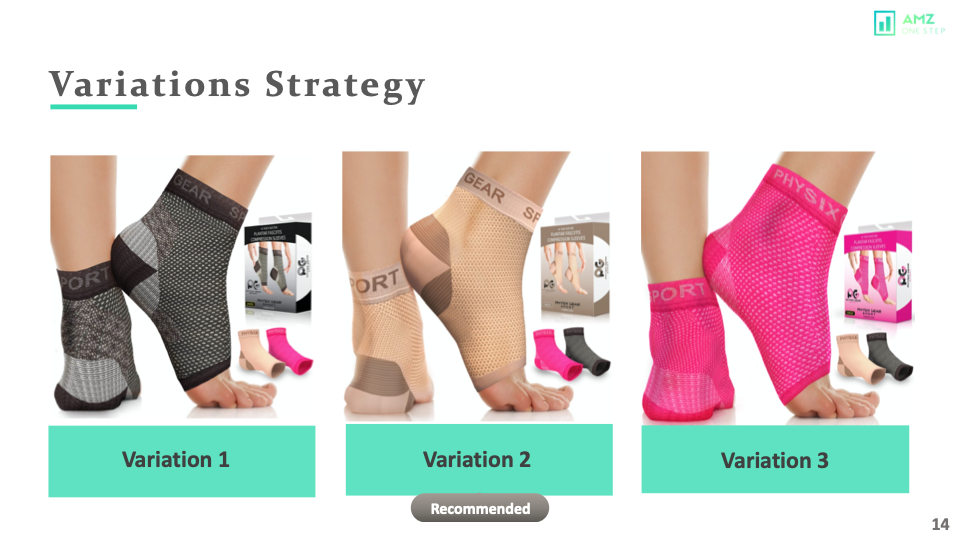
Amazon Product Photography with Variations
In order to get more sales, you need a creative and exciting product image. This could be anything from color schemes or even just adding extra text into images for emphasis- what matters is that it makes people want to buy your products!
The way in which Amazon sellers market their items can have an impact on whether customers actually end up purchasing something when browsing through other options available on the website. This often means changing things like colors used within pictures as well as cropping at certain angles so there isn’t any unnecessary background. From adding a few design elements to adding colors or changing angles, trying different variations of a specific product can benefit your sales in a great way.
Read More:- Amazon Product Photography Tricks | How Product Photography Increases Your Sales?
It can be difficult for sellers to make up their minds about which type of photography is best. There are pros and cons with both conventional product shots as well as 3D renders.
Many sellers face a dilemma when it comes to choosing the best way of showing their products on Amazon. Some decide that conventional product photography is more suitable, while others prefer 3D renders or computer-generated graphics with flexible lighting effects for easier editing and retouching capabilities. Selling online can be complicated since there are many different aspects involved including pricing strategies as well as being able to offer customization options such as changes in fabrics or colors you want; this takes time but ultimately leads customers into buying something specific from YOU!
Read More:- 3D Rendering vs Product Photography – Which One Is A Better Option For Amazon Sellers?
Affordable Amazon Photography Service
With so many photographers out there, it can be hard to know who is worth your time and money. AMZ One Step provides affordable amazon photography services that are sure not just meet but exceed all expectations of quality in a workspace shoot or even one-off pictures from headshots.
Our team at AMZ One Step strives on high standards when delivering creativity with its customer’s vision – making us uniquely qualified as experts working professional images made specifically tailored as per Amazon requirements. Get your product in front of buyers with our expertly taken photos that will help you generate more sales faster! Trustpilot reviews show us as being experts who know their stuff- see why others choose to work with Us every day.
Are there any Amazon photographers in China?
It turns out that the answer to this question is yes! There are a few Amazon photographers in China, and I recommend getting your photography done by AMZ One Step China studio. They also have locations across America, including the USA, and Canada. AMZ One Step is one of the prominent providers of Amazon photography services. We are confident enough in ourselves that we don’t need any other proof than satisfied customers like yourself.
Are Fiverr or Upwork the best places to find amazon photographers?
Amazon sellers struggle when it comes to finding photographers. Most of them rely on Fiverr and Upwork as they are two of the best places to find talented amazon photographers. However, agencies are more likely to offer good service, but you must compare prices, so your budget doesn’t get stuck with an agency that only takes care of their own wallet instead of yours!
Read More:- Amazon FBA Product Sourcing | Options Other Than Alibaba
What is 360 Amazon photography?
If you’ve ever shopped on Amazon, you know that the site offers a seemingly endless selection of products. But what you may not know is that Amazon has taken its product offering one step further with 360° photography. This unique feature provides shoppers with a realistic view of the product from all angles, making it easy to determine if the item is right for them. Learn more about this innovative technology and how to use it below!
It’s a relatively new technology that allows customers to view products in a completely new way. With 360 Amazon photography, customers can zoom around products to see every angle. This makes it easier for them to decide if they want to purchase the product. Interested in learning more? Keep reading! I’ll explain how 360 Amazon photography works and give you some examples of businesses that are using it successfully.
How many images are recommended for a listing?
Amazon allows up to 9 images for a listing. As long as you have 6 or more images on your listing, It is considered an optimized listing. You can also consider adding a product video on your listing.
Is 3D rendering Amazon compliant?
As Amazon becomes more and more popular, merchants are looking for ways to create a competitive advantage. 3D rendering is one way to do that, but is it compliant with Amazon’s policies? While technically not compliant, most experts say that you can use 3D rendering as long as you’re careful about how you do it. Here’s what you need to know.
When it comes to 3D rendering, there are a lot of things to take into account. One of the most important is Amazon’s guidelines for product images. Though they technically don’t allow 3D rendered images, many sellers use them anyway because they produce better results than photos. You want to know why you should consider using 3D renders in your Amazon listings and how to make sure they comply with Amazon’s rules. Get in touch with our expert.
Importance of graphic design and photoshop in amazon photography
Graphic design is a necessary part of any effective Amazon photography session. In order to create an appealing and professional-looking photo, you need to use graphics to direct your viewers’ attention to the most essential elements in the image. Adobe Photoshop is a powerful tool that can help you do just that. With its wide range of features, you can easily manipulate and improve your photos. By using graphic design and photoshop, you can take your Amazon photography to the next level.
In order to get the best pictures for your product, you need to be very creative. I suggest using Photoshop and graphic design apps because these will allow you to create really stunning images that people won’t be able to resist.
Learn from big brands on amazon
If you’re like most online entrepreneurs, you’re always on the lookout for ways to improve your Amazon business. One area that can make a significant impact is your product photography. But photographing products can be tricky – especially if you’re new to it. That’s why today we’re going to take a look at some of the best ways to photograph products, based on what big brands are doing. By learning from the pros, you’ll be able to create photos that stand out and help increase your sales. So let’s get started! There are some very big brands that sell their products on Amazon. They know how to do product photography well, and you can learn from them.


 Read More:-


 Read More:-
 Read More:-


 It all comes down to your personal preferences and what works best for your product. Of course, these types of shots will require a bit more hard work, but it is going to worth your time.
 Amazon is not the place for these kinds of images. It will make your brand look fake and trustworthy, while at the same time, it will make you lose potential clicks and sales.
 When unprofessional and untrained photography takes a zoom shot, it creates the noise that hurts the picture and you at the same time.